|
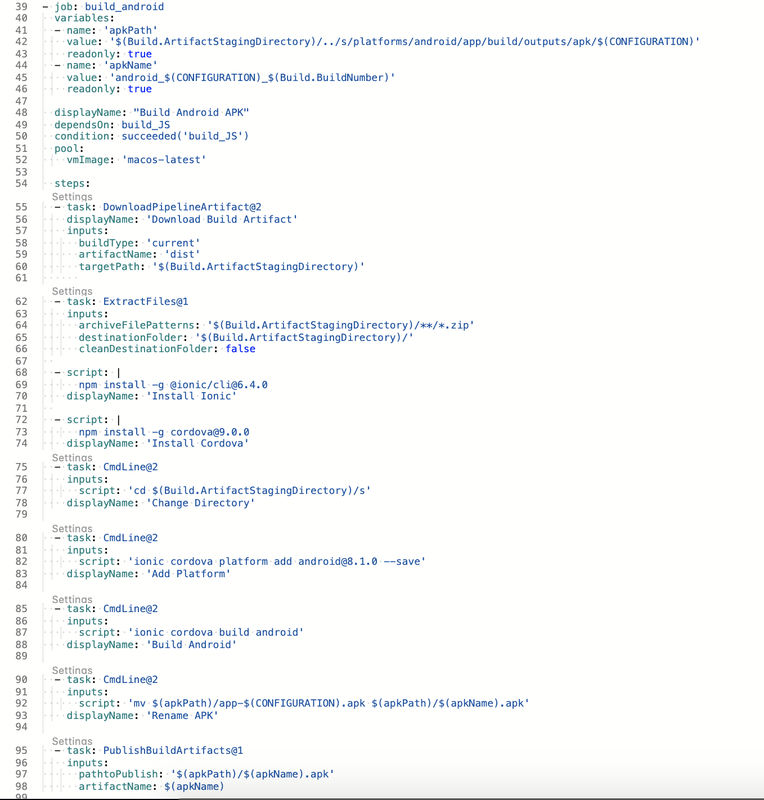
In Part 1 we setup the CI build to trigger on changes to master. In Part 2 we are going to modify the master build to output apk and ipa files we can install on our devices. Below is the complete YAML for the Android job let's go over it. Lines 40-46 are setting up some variables that will be later in the renaming and publishing tasks. Variables are scoped to their parent element, job in this case. Lines 49 & 50 are very important. By default all jobs run in parallel. I want this job to run after the JS bundle job so I added that as a dependency. The condition makes sure this job is only run if the JS bundle succeeds. You can also specify Always, if you want a job to run no matter what, Failed, to run only when the dependence failed, SucceedOrFailed, runs if the job succeeds or fails but not if the job was cancelled. Check out the documentation for more options. Jumping down a bit to line 55 we get into the actual build steps.
In this tutorial we're going to walk through using Azure Devops as a CI pipeline to build our Ionic hybrid mobile application. To start we are going to create a new blank app using the Ionic CLI. I'm calling this project Boardgame Comparsion. To start I installed the latest ionic cli
npm install -g @ionic/cli
After install the latest cli we create a new app by calling ionic start appName.
ionic start boardGameComparsion
I selected the blank app, Angular routing and did not select Capacitor. After the cli completes we'll have a default Ionic/Angular app. Next is setting up the Azure side. I'm going to use Azure Devops as my git repository, agile board, and CI/CD pipeline. I already have an organization setup in Azure, but if you don't you can sign up for the free trial. Once you have your Ionic app created and DevOps organization setup you can push your local code to the repo that in Azure. The Ionic CLI should have initialized a git repo, but if it didn't just open a terminal/cmd, navigate to the root for your project and enter "git init". Once git is initialized you can add the remote origin as shown in your repo then push your local code to Azure using "git push -u origin master". Now that your local git is configured we'll setup the build pipeline.
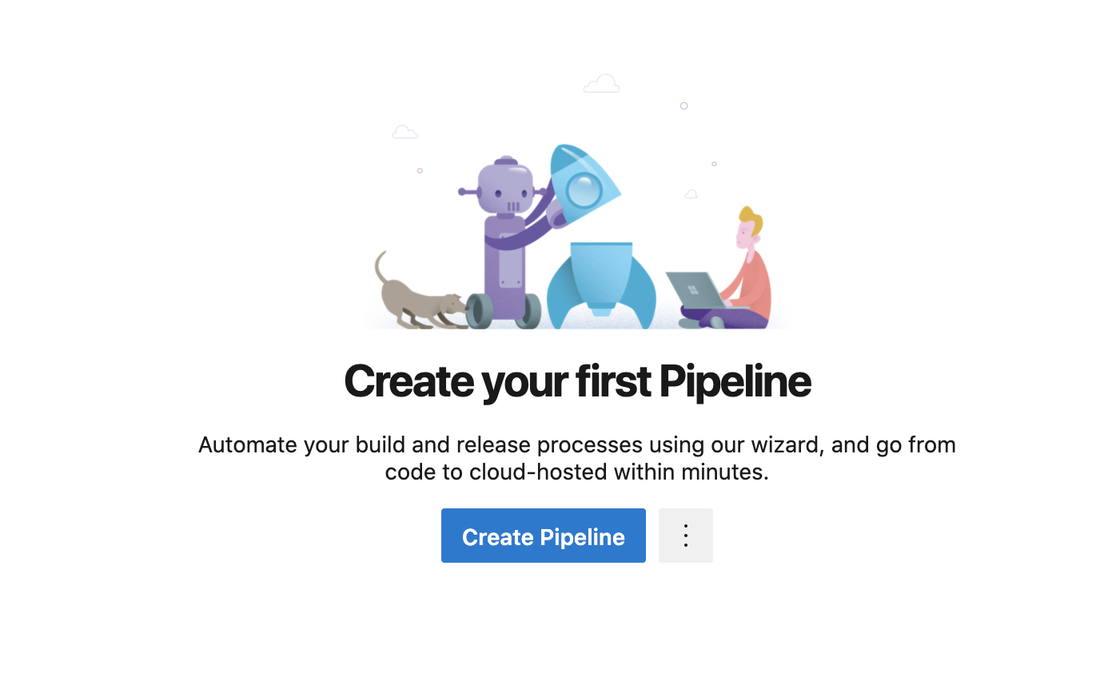
To setup a pipeline click on Pipelines under Repos on the left side navigation pane. Since this is a new project we don't have any existing pipelines, click the Create Pipeline button to get started.
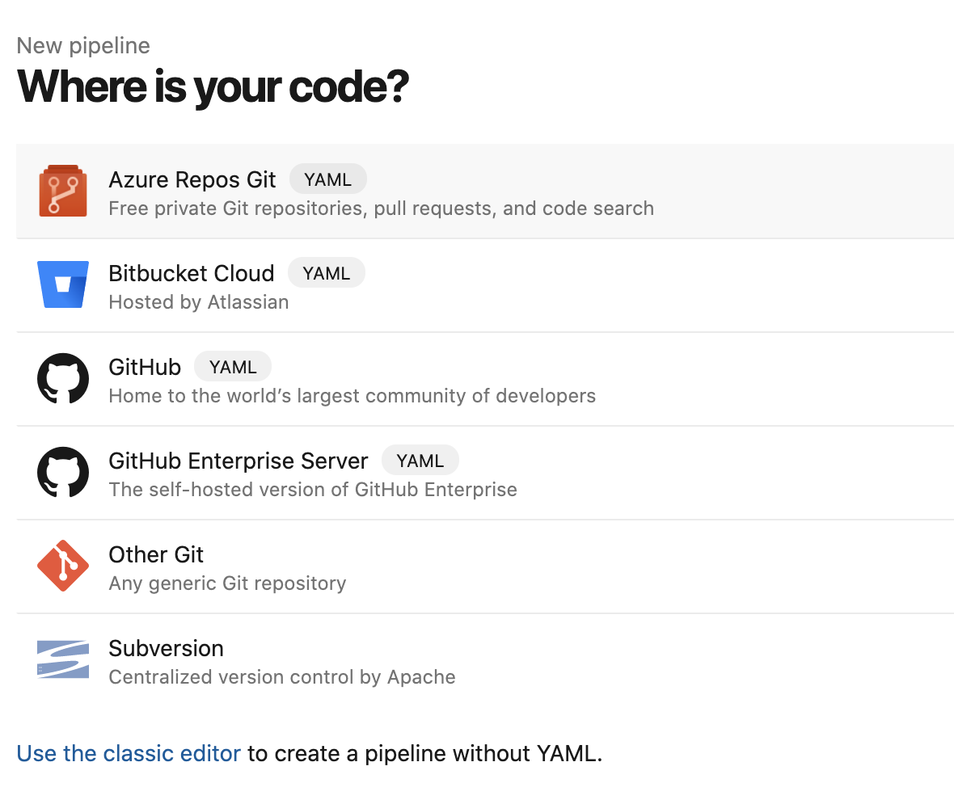
Next we need to tell Azure where our code is hosted. For this project we have everything in Azure so we'll pick the Azure Repos Git option.
Update to Part 2. After spending more time with the build pipelines and learning more about how the release pipelines work, I've been two changes to the builds I setup in Part 2. One, I created a second build pipeline just for Develop and left the original pipeline for Master. Two, I decided to use the date format for the build number of Develop. Now onto Part 3.
In Part 1 we created the devops project and then in Part 2 we created the CI build pipeline. Now it is time to create the release pipeline. Since I don't want to create a release every time develop builds I created a second build for that branch. Master is my release branch and I'll be using that one to create my release pipelines. In the end I hope to have a release process that will take the build artifact (a nuget package) and push it to Nuget.org. Let's get started. When you first create a DevOps project a default release pipeline will be created for you. I deleted mine so I'll be starting from scratch. When you don't have any releases created you'll see an empty dashboard like this. 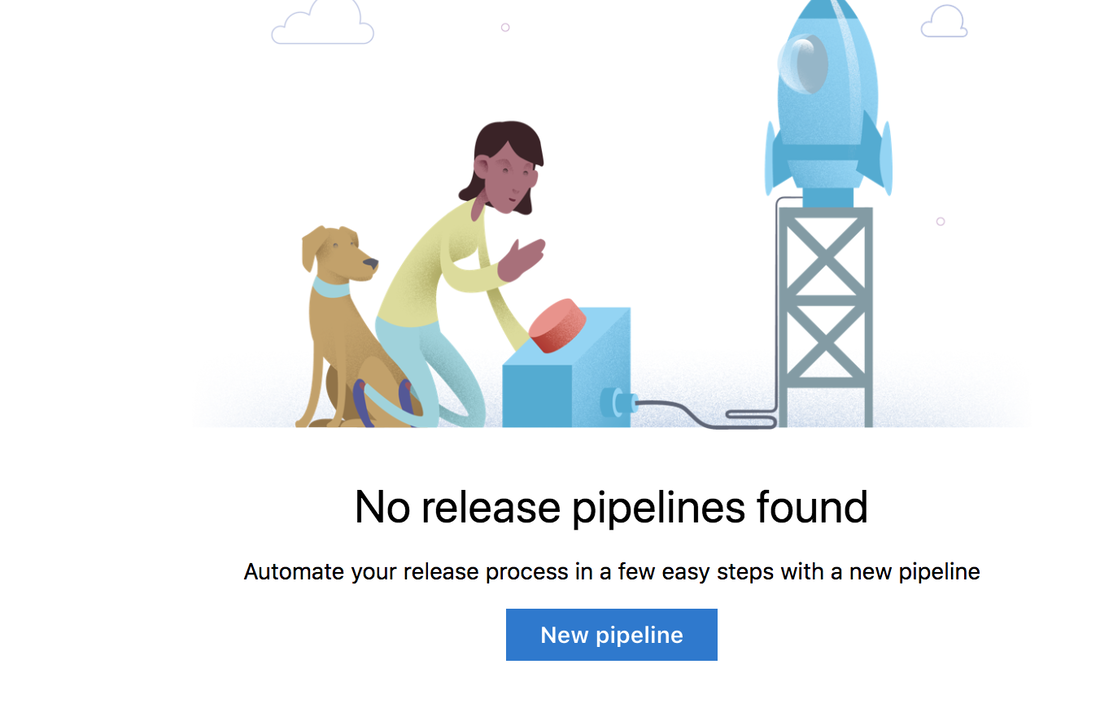
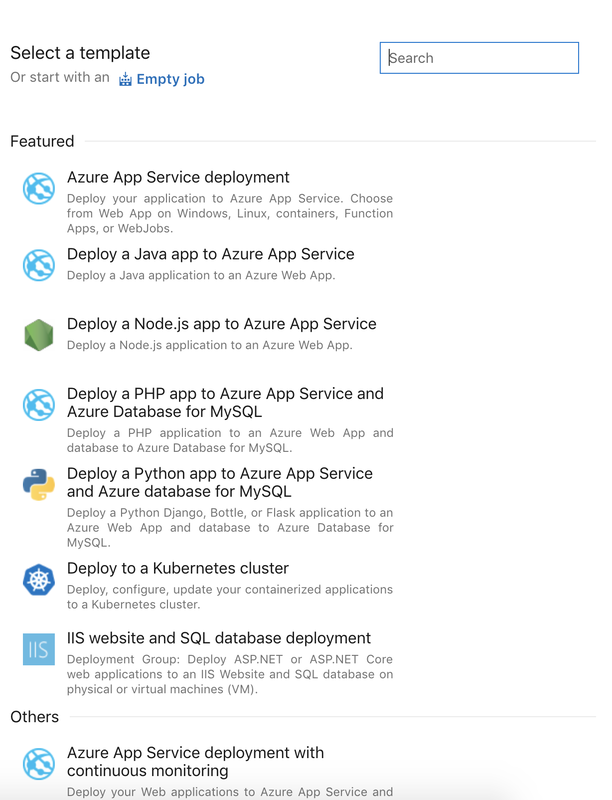
When you create a new release pipeline the first thing you will have to decide is which template to use. I'm going to create an empty job and customize from there.
Next you give the first stage a name. Make sure to choose a name that fits with what the stage does. I only need stage for this simple pipeline.
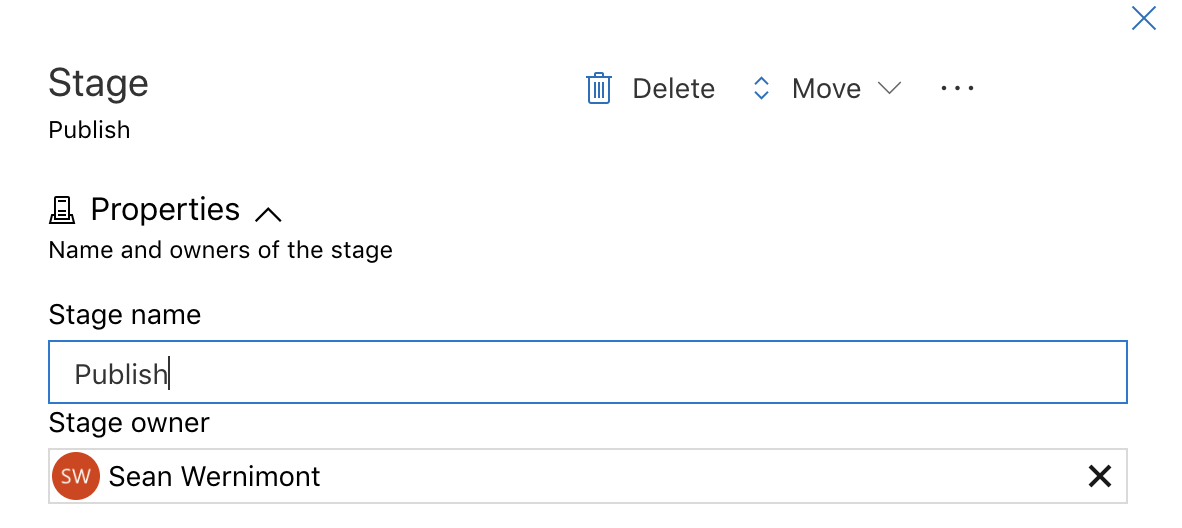
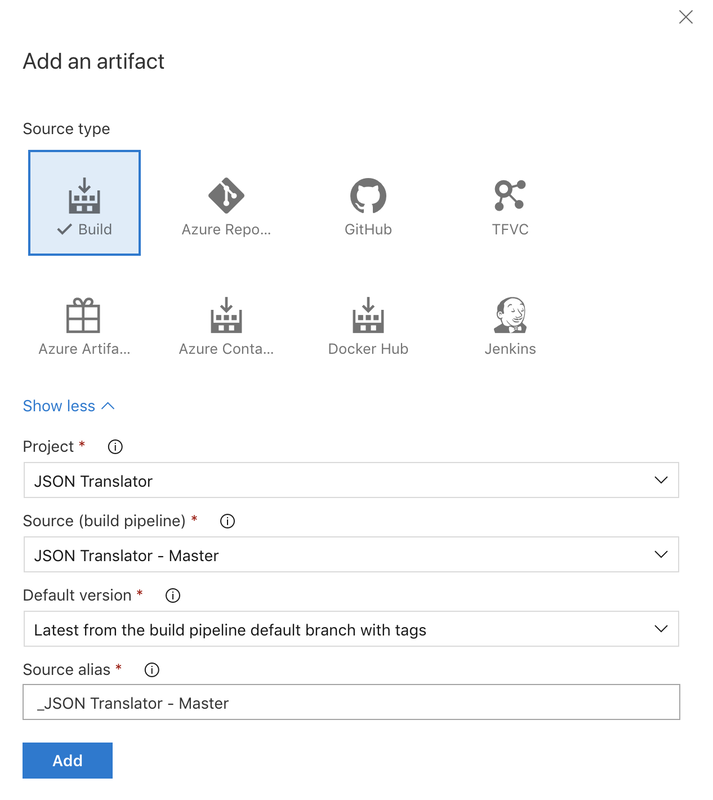
After naming the stage close that window by clicking the X in the top right corner. Next I need to get the artifact that I'm going to publish. I'm going to use an artifact from a build process, but there are several other artifact sources to fit your needs. In the source dropdown you can select any of the builds that you have created in this project. Make sure to select the right now, don't want a dev build making its way out to production. Once you have set up the artifact click Add.
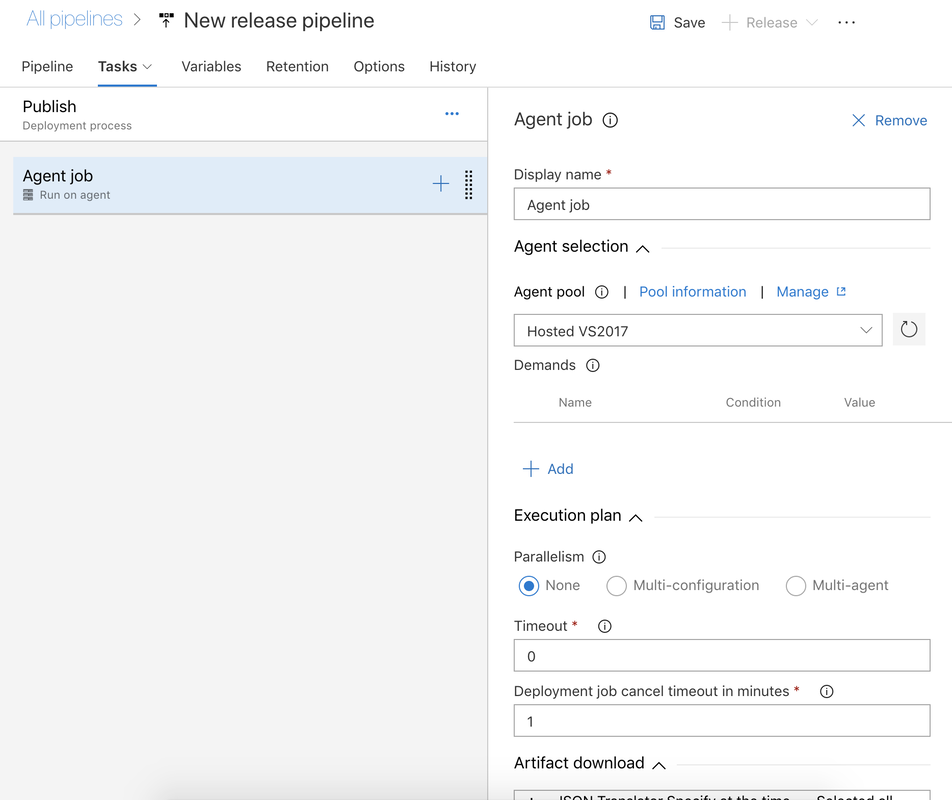
We have access to the same (or very similar) tasks here as we did when we set up our build. This time we are interested in two tasks for Nuget. The first we want to make sure that we have nuget on our build agent. And the second is the step that will push our package to nuget.
Search for nuget and add the task called Nuget Tool Installer. As of this writing the default nuget version is 4.3.0 so I'm going to leave it. If you need specific version just enter it in the version field. 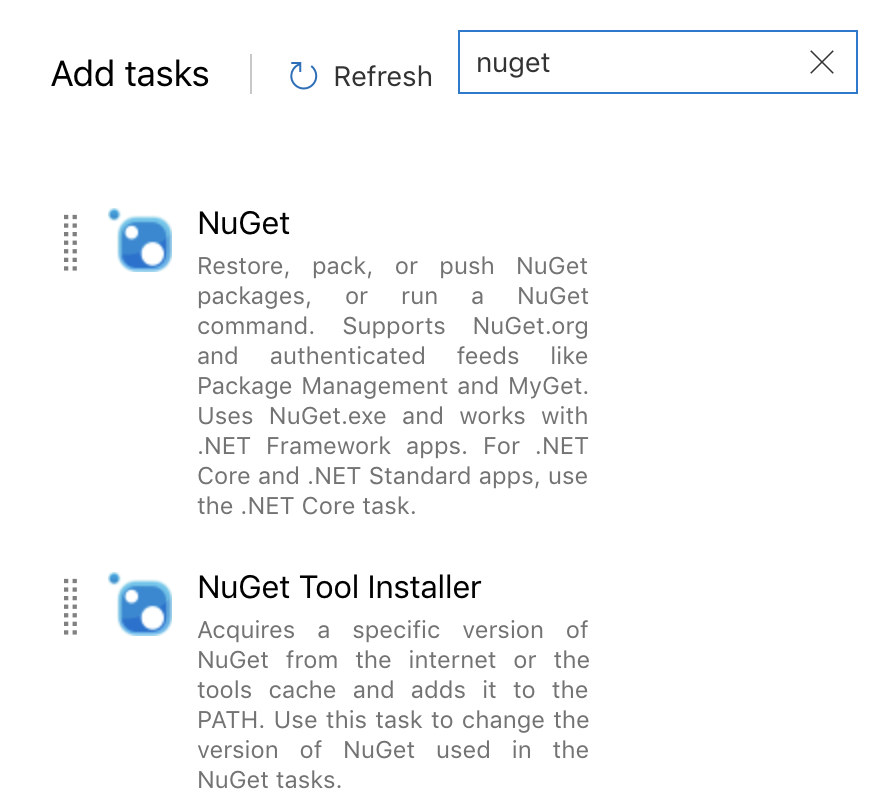
Next we add a task to push our package. To do this we need to add another task by clicking the + on the agent and searching for Nuget, just like we did for the tools installer. The only difference is this time we want the main Nuget task.
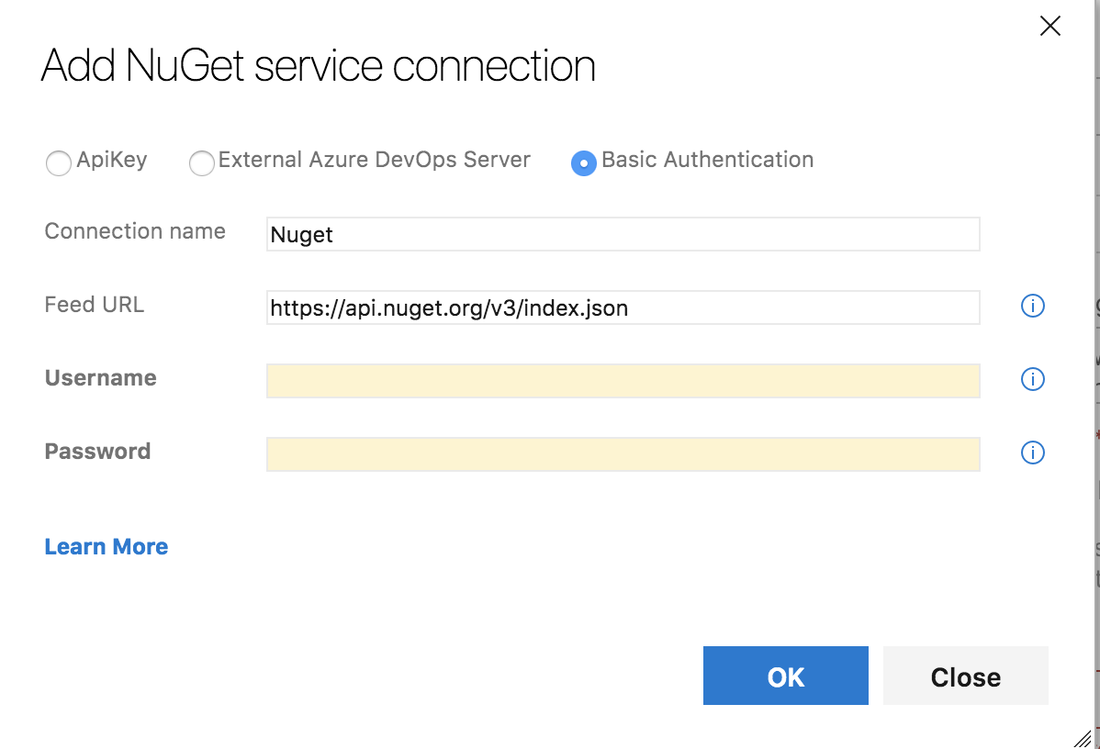
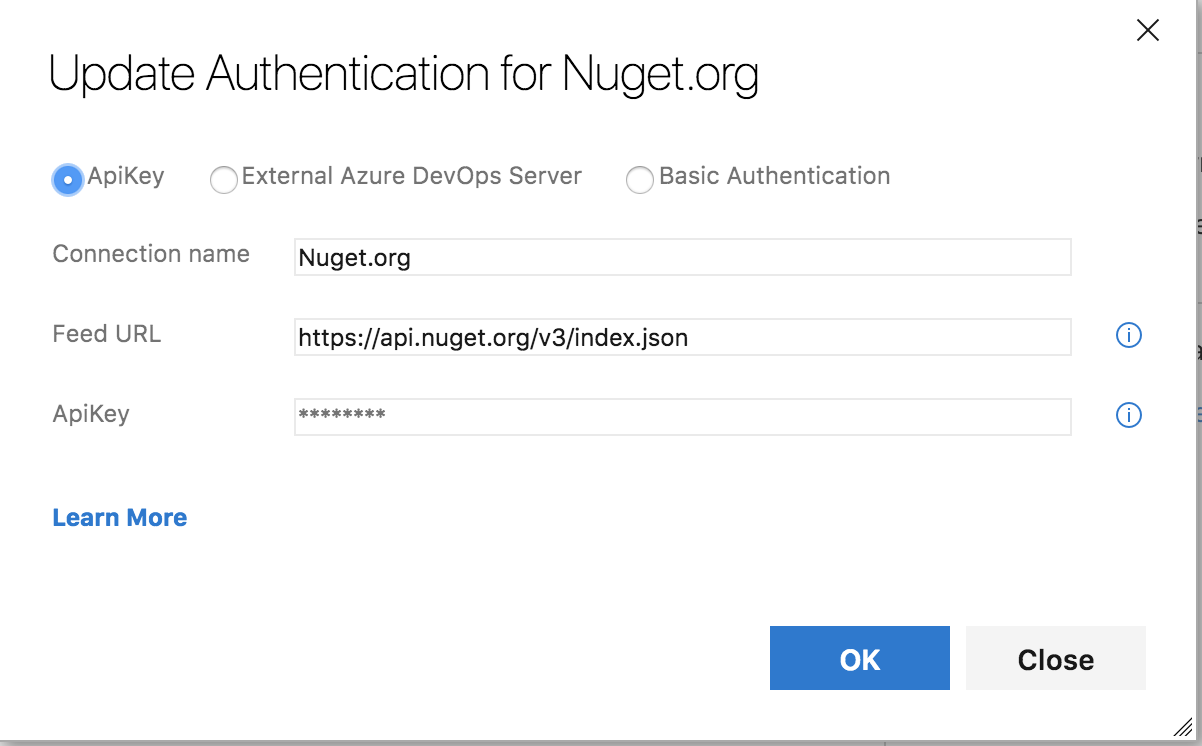
The display name and command are pretty much what you'd think they are. I did change the Path to the package a little bit. By default it lists the path to the specific package, so I changed it to add the wild card in the path. If you wanted you could replace everything after the $(System.DefaultWorkingDirectory)/**/*.nupkg. Next you need to add a nuget server. You can publish to an internal feed or an external server. For this example I will be publishing to public nuget.org. If you already have a service connection setup you can select it from the dropdown, if not click + New. 
You have the option to use Basic Auth which requires your username and password. Or you can generate an API Key from Nuget and use that. Due to a bug in dotnet core if you want to use the API Key you will need use the Nuget Task.
After you have set up the service connection and have configured the task the last thing to do is click Save. At this point we have a release pipeline that will take the artifact from the latest build and push it to nuget. We stop here if we want to kick off every release manually. If we want to start a release as soon as an artifact is available or on a pull request we have to select the trigger (the lighting bolt) on the artifact. From there you can select either to start a release on artifact or pull request or both.
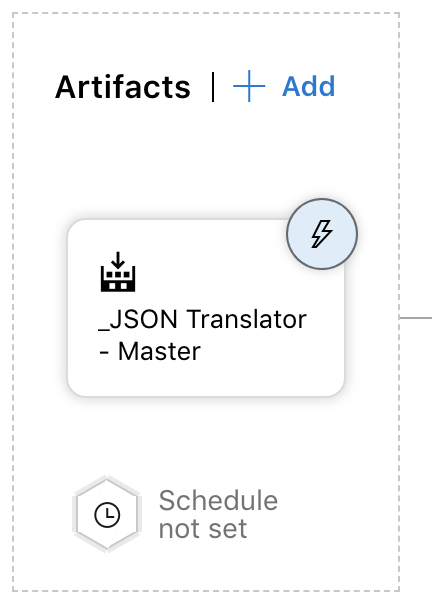
I do want the release to start as soon as the master branch is built so I enabled that trigger and set the build branch to master.

That's it. It is very simple to setup a release pipeline with Azure DevOps. In this series we have created a new project, setup a build that automatically triggers on commit and now we have a continuous deployment release setup on the master branch. Thanks for making it through the entire series. Leave a comment or tweet me (@swernimo) with you see something I missed.
Good luck and Happy Coding.
In Part 1 we walked through the process of creating a new DevOps organization and project. Now that that is done we the next step is to setup our CI builds and add the status badge to the readme.md file in our github repo. Let's get started.
First we need to navigate to our project. To do that go to https://dev.azure.com/{organizationname}. You should see a list of organizations on the left and in the center you should see titles for each project under the selected organization. You can see that I have two organizations setup and I have 1 project under my currently selected organization. Click the name of the project you want to open. 
Back in September Microsoft announced that they were creating a new solution for managing your devops needs in Azure. Since then I've been wanting to play around with it and try out what's available, but haven't had the time. Well, I finally completed something else I was working on so I decided to circle back and the experiment with Azure Devops. My goal is to create a build and deploy pipeline for my JSON Translator Project. When everything is said and done I hope to have a build that automatically triggers whenever I push a commit to my github repo and then have a deploy process that will publish the new package to nuget.org. The first step is creating the devops project in Azure.
Creating a new devops project is just like creating any other resource in Azure. Click on 'Create a Resource' on the top left and then click on DevOps Project. 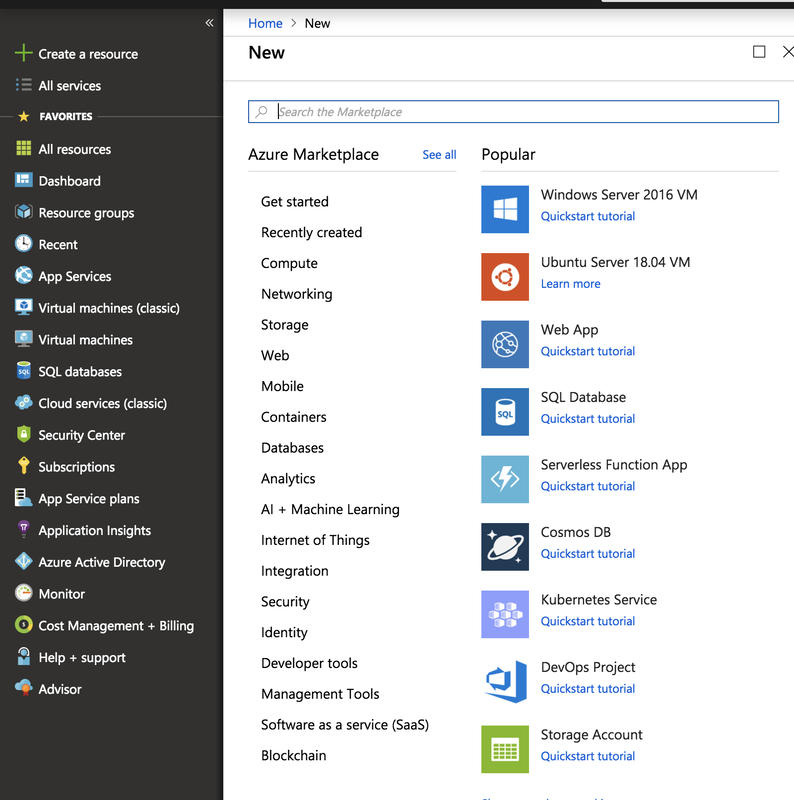
The project that my team is tackling at work is a new employee portal that user will land on after logging in. One of the requirements is that we support multiple languages. I looked at the Microsoft Text Translator API to translate the web page but that leads into a couple other sub-requirements. First is we only want to translate our static content; labels, navigation menu, etc. Our customers are organizations and they have told us that they do not want us to translate their content, alerts to employees and such. The second sub-requirement is that we don't want to have to make an additional service to translate each page as it is rendered. So with those two additional requirements that killed passing the entire HTML page to Azure. Currently we have a single JSON document that contains all of the messages in different languages and we use that as a look. That works fine for now, but it has a few flaws that would prevent it from scaling well. First, every time we add a new label we have to add it to the main English lookup and manually translate it and add it to each other language we support (currently we support English, Spanish, and Polish). Secondly, if we ever wanted to support additional languages we would have to manually translate each element which would be very time consuming. With those issues in mind I took a second look at the Text Translator API to see if I could make it work for my use case.
The REST Interface
While reading through the online documents I found the API Reference for the REST interface. I first looked at the TranslateArray endpoint, but decided against using it. Firstly, my source document is already over the 10,000 character limit for a single call and I didn't want to manage chucking the request. Secondly, I wanted to make sure that each translated word could still be matched with the lookup key. After giving up on the TranslateArray I started looking at the Translate endpoint. I settled on the Translate endpoint mainly due to being able to match the lookup key with the word after it has been translated. Since the translate endpoint only supports a single word or phrase at a time I set about writing a small application that would loop over the messages, call the Text API, match the translated word with the lookup key and finally write the translated file to disk.
Translator Console App
In my previous post I walked through the initial creation of a Register User Logic App, checking if the user already exists, and then returning an error if they are already registered. Today I'm going to cover validating the password against a set of rules (and what happens if that validation fails), inserting a new record into the database and finally returning a success response back to the user. Without further ado, let's get started.
Password Validator Function
To begin I'm going to create a new Azure Function that will handle the password validation. I'm going to use my Simple Password Checker as the basis for the function. Since I know that this user isn't registered I deleted the check for previous password. The Char.isSymbol is a little weird, it didn't match on the ! symbol like I would have expected. Check out the MSDN reference for more information about what symbols are supported. Below is the completed code for the function. Now that we have the function created, it's time to go back and edit our Register User Logic App.
Password Validator Function
Updating the Logic App
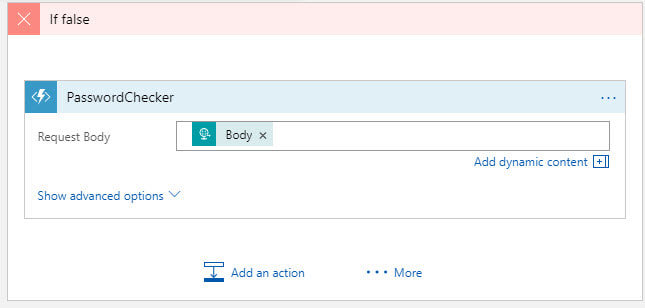
We already handle the if condition (the user is already registered) so now we need to handle the false condition (new user). Let's add an action that will call the function we just created and pass in the original request body. First click on 'Add an action' then select the Azure Functions connector. Next select the Function App name then the individual function you want to call and finally pass the request body to the function. Since this function can return different status codes we need to add another if condition inside the current if false condition.
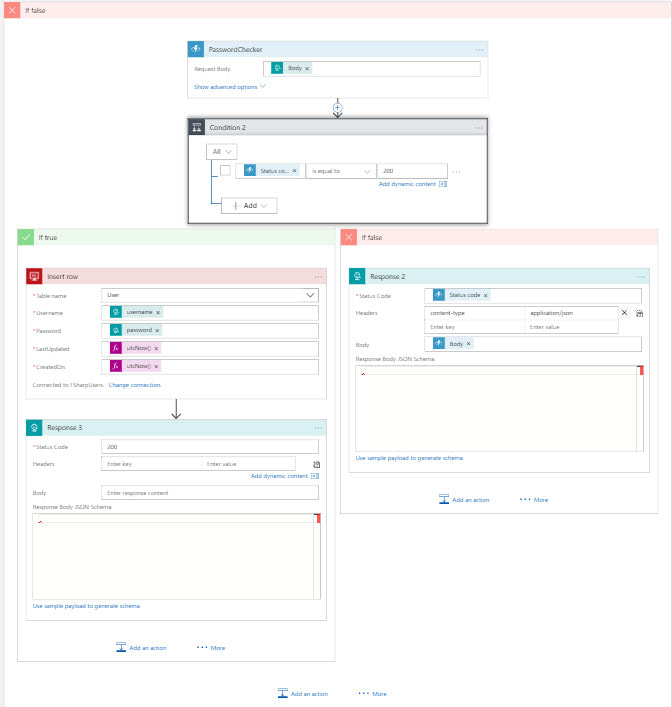
We will use the status code returned from the function as the basis for our decision. If the status code is 200 that means the password is valid and we can insert the row into our database. We are passing in the username and password that we received from the body of the original request and using utcNow() function for the two date fields. After we insert the row we are returning a success response to the user so they know they have registered their account. If the status code is anything other than 200 we are returning the status code and any messages to the user.
Testing
Time to fire up Postman and test out the workflow. I copied the URL from the trigger for the logic app and pasted it into postman. First I tried a new user with an invalid password. I kept getting this strange message about the condition failed. So I tried to register a new user with a valid password. When that worked first time next I tried a duplicate username and I got the error I was excepting. So after a little digging I found the answer.
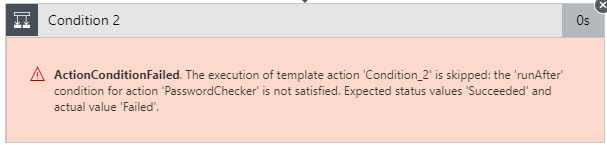
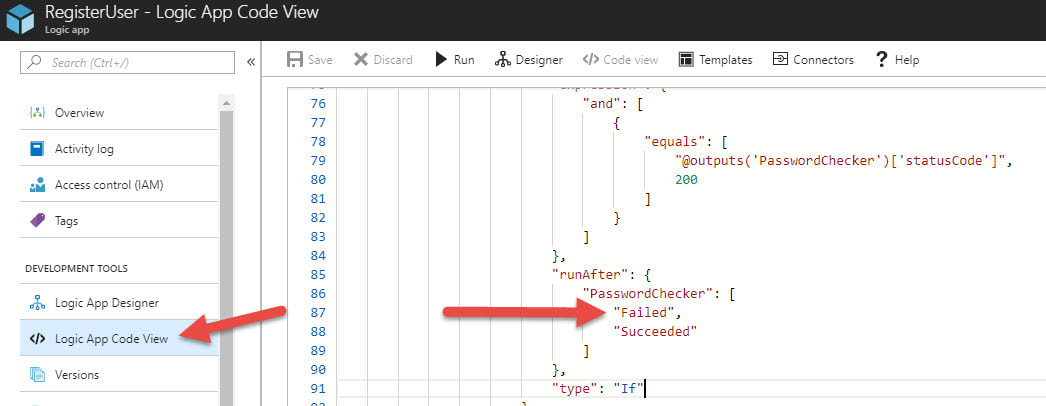
In order get the nested condition to work I had open the code view of the logic app and find the condition that was throwing the error. The fix was simple enough, I just had to add the Failed to the run after object for the function app. Once I updated the run after conditions then the invalid password workflow returned the error messages as desired.
Final Thoughts
Having to change the code for the logic app to handle the nested if condition was strange, but other than that everything worked great. I kept this simple as a Proof of Concept and as such I skipped certain things you'd want to do in production. In production you should never ever pass a password in plain text. You always should encrypt the password in transit and then hash it at rest. Also, if you wanted to you could add additional logging when the user failed password check. You probably would want to split the the password if false condition so you could handle invalid password differently from server errors. So while this is a very simple PoC I think it really shows the power of Logic Apps. The only code we wrote was the stored procedure to check if the user is already registered and then function app that validates the password. All the connections to SQL Server and inserting the data was handled by Azure for us.
I think Azure Functions are great, but the inability to use SQL Server is a major draw back. If we want to go serverless, but still use SQL Server are we just out of luck? Absolutely not! In this tutorial I'll design a simple Register User workflow using Azure Logic Apps and SQL Server. Let's get started by creating a logic app.
To start login into your Azure Portal, navigate to Resource Group you want to use (or create a new one) and then add a new Logic App. Make sure to select the correct subscription (if you have more than one), the resource group you want, location, and if you want analytics turned on. 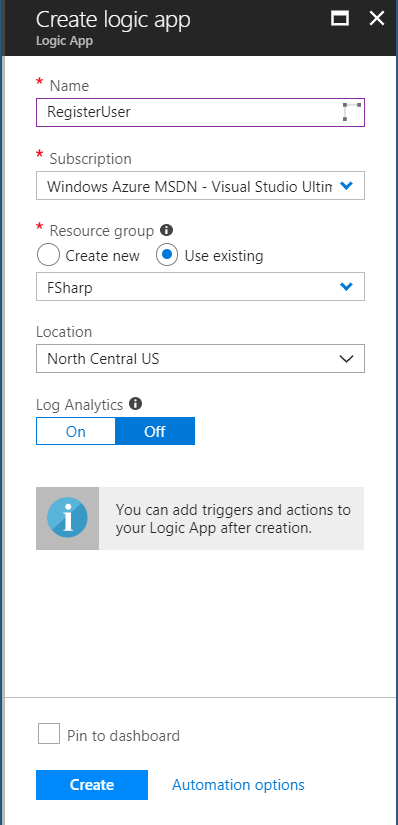
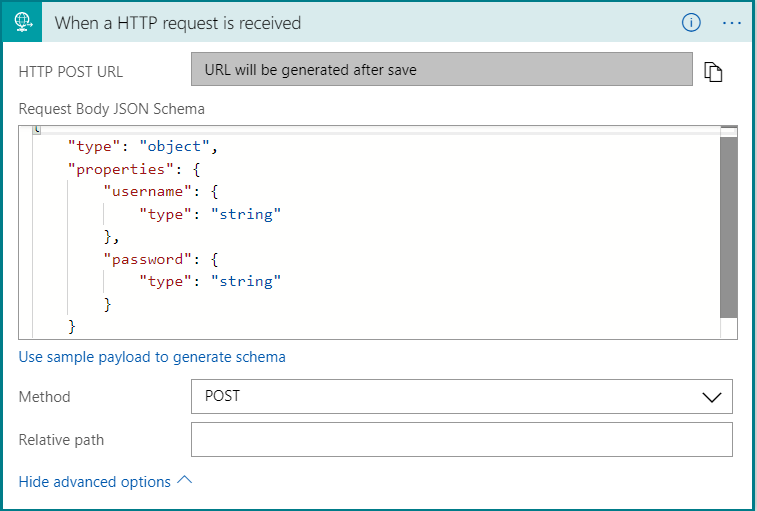
I want this logic app to be triggered by a post request. For this example the post body will be a very simple JSON object that contains only the username and password. On the logic app designer search for a HTTP request trigger. Expand the advanced options and select POST as the method. If you are new to creating JSON schema you can generate the schema from a sample payload. The next step will be to add an action that checks if the user already exists in the database and then follow one of two code paths.
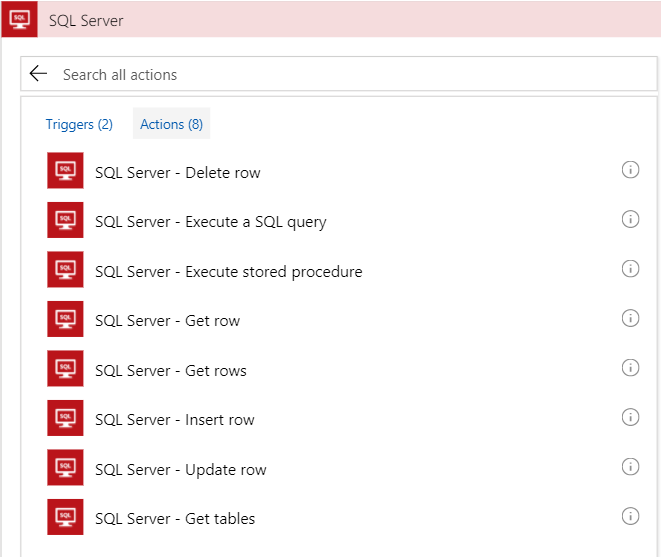
Before we add the if condition, we need to add the action that will check the database. To do that we need to add a SQL Server connector. Click on New Step then Add Action next click on SQL Server in the connectors section. At first I tried using the Get row action. The issue I ran into is that I could not find a way to check if the row exists. Maybe there is a simple way to do that, but I couldn't find it. After some google searches it seemed like the recommended solution was to use a stored procedure.
In my last post I described the database design for my payroll poc project. For that tutorial I created the database and data with SQL Server 2017 that I have running on my local development machine. That's fine for initial development, but I need that database in Azure for the poc to work as I'd like. In this tutorial I'm going to use the Azure Data Migration Assistant (DMA) to get my database in Azure. The migration assistant is a small program that you download from Microsoft then install and run against your local environment or dev server. When you start up the assistant you'll be greeted with a splash screen with a small walk through create a new project. You can create either an assessment or a migration project. It is a good idea to do the assessment before you blindly try migrating you database. The assessment will check for features that are enabled on your database that may not be compatible with the destination server. When I ran the assessment it flagged that I was using Windows Auth and that it wouldn't work on Azure SQL. After you fix any issues you can create a new migration project that will move your schema, data or both to the new destination. I setup an Azure SQL Database in Azure portal already that I'll use as the destination for the migration. Let's walk through the whole process from start to finish. The Assessment ProjectToday's post will introduce the basic database design I'm going to use for the Payroll POC project. As you can see the database is made of 9 tables and is centered around the Employee table. In a real, production system you would have dozens more tables covering things like retirement contributions, insurance deductions, and expense reimbursement, but for this POC this should be enough. Starting with the Status table, let's cover each table. The status is related to the employee table and is used as an enumeration for the employee's employment status (ie Active, New Hire, Terminated, etc). The employee table is the center of this universe. It only has a few basic fields like First and Last name, last changed, and references to status and address. The address is table is split out from the employee to allow employees to update their addresses while maintaining a history of previous addresses. The Is Active flag in the address table is used to determine the current address. In a production system you would probably have multiple addresses associated to a single employee (ie home, work) but for this I choose to stay with a single active address per employee. The Federal Tax table is unique because it has no foreign keys in it all. It's purpose to hold the multiple tax bands. There might be a band for 10% for income up to $15,000 per year and then another band at 15% up to $30,000 per year and so on. The percentage column is the tax percent and the upper limit is the max amount for that band. The system will use multiple bands as needed to calculate the total federal tax. Next is the state table. This table is largely intended to be an enumeration like the status table. After state is the state tax table. The main differences between State and Federal tax is that state is just a flat percentage, no bands, and state tax is optional. The pay rate table holds how much the employee makes either as an hourly rate or as a salaried position. I considered using a pay type flag, and in production you may want to, but decided to simplify the table and just allow both hourly rate and salary to be null. The Time table is the record of how many hours an employee worked between the start date and end date. The hours worked are recorded for salaried employees, but aren't used in the calculator. For hourly employees any work over 40 hours per week will earn time and a half (1.5 times their normal hourly rate). The last table is the check history table. Initially this table is empty and is only populated after the payroll engine is run. It holds the check date, the total amount earned, how much tax was taken out for state and federal and then finally the net amount paid to the employee. Each table also has an ID and Last Changed (or almost every table). The ID field for all tables is just an identity column starting 1 and increment by 1 on each insert. The Last Changed is a required DateTime field but the default value is set to GetDate() in MS SQL Server. Finally, in in the interest of keeping thing simple I did not add any referential integrity to the foreign keys. That's it for the database design. Nothing too strange and I'm not handling all the use cases a full system would need, but this should be enough for this POC. I have attached the database backup file from SQL Server if you would like use it yourself. I populated all the tables, except for Check History, with a few records to get started. Thanks for stopping by and Happy Coding. 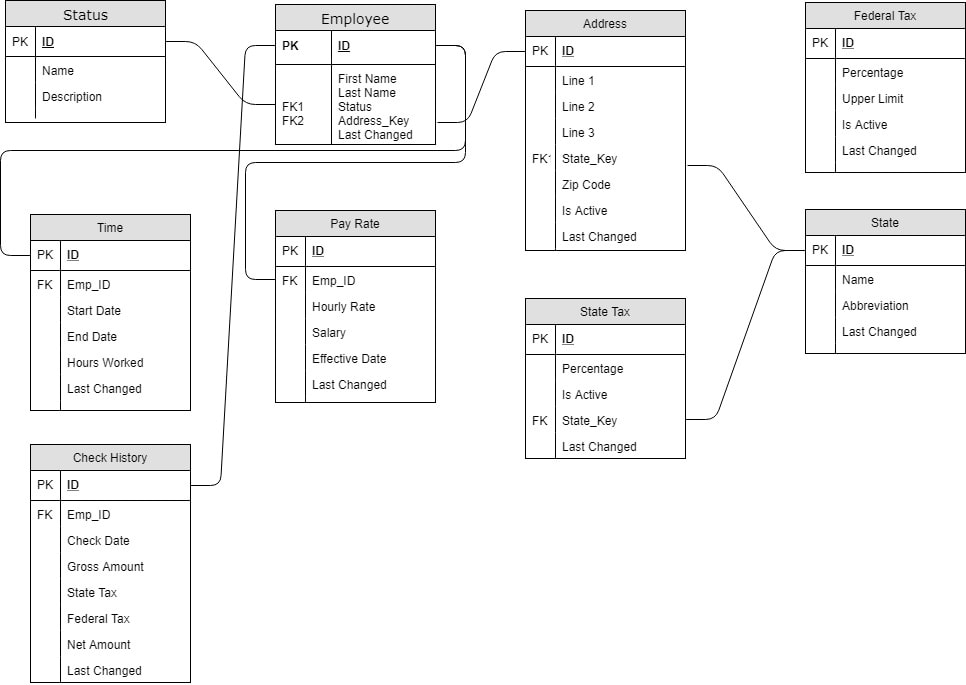
|
AuthorWelcome to The Blind Squirrel (because even a blind squirrel occasionally finds a nut). I'm a full-stack web and mobile developer that writes about tips and tricks that I've learned in Swift, C#, Azure, F# and more. Archives
April 2018
Categories
All

|
||
 RSS Feed
