|
In Part 1 we walked through the process of creating a new DevOps organization and project. Now that that is done we the next step is to setup our CI builds and add the status badge to the readme.md file in our github repo. Let's get started.
First we need to navigate to our project. To do that go to https://dev.azure.com/{organizationname}. You should see a list of organizations on the left and in the center you should see titles for each project under the selected organization. You can see that I have two organizations setup and I have 1 project under my currently selected organization. Click the name of the project you want to open. 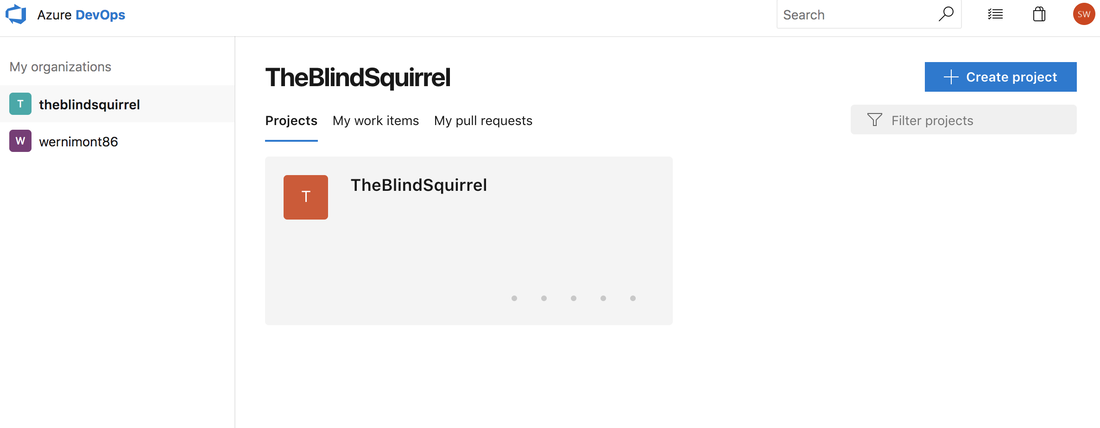
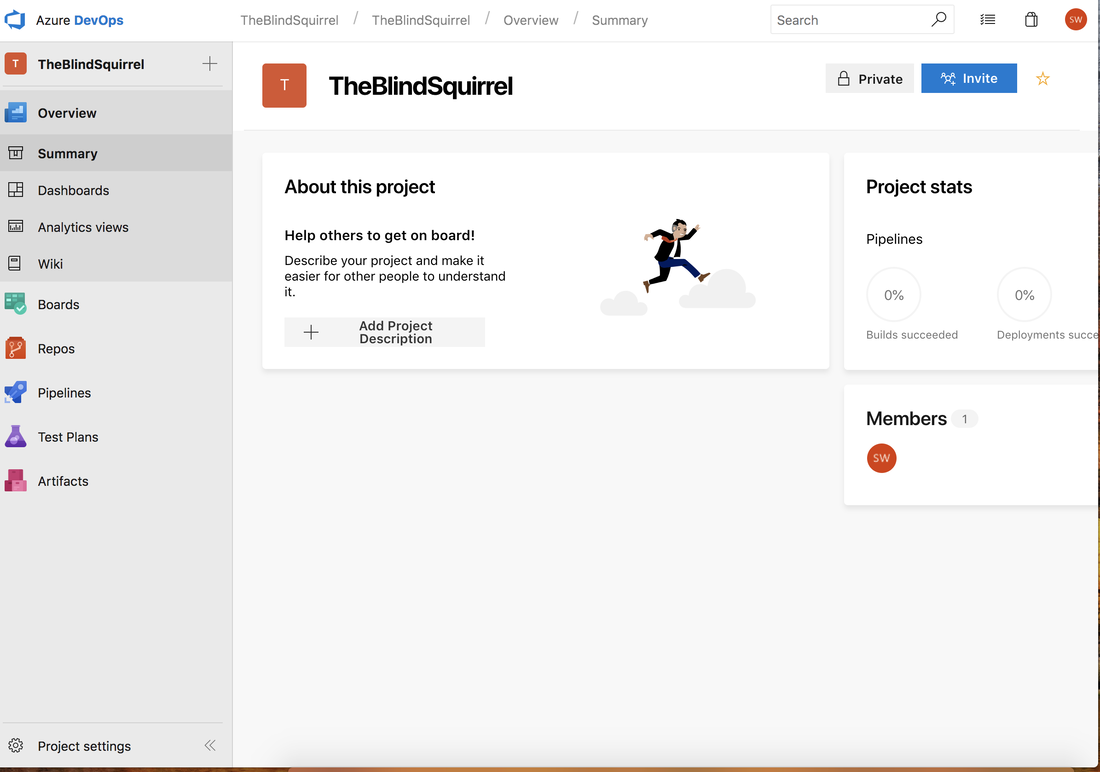
Next you will land on the overview summary page for your project. Here you can add a description of the project, see the members of the project and statistics about the various build pipelines. We are interested in the build so click on Pipelines on the left.
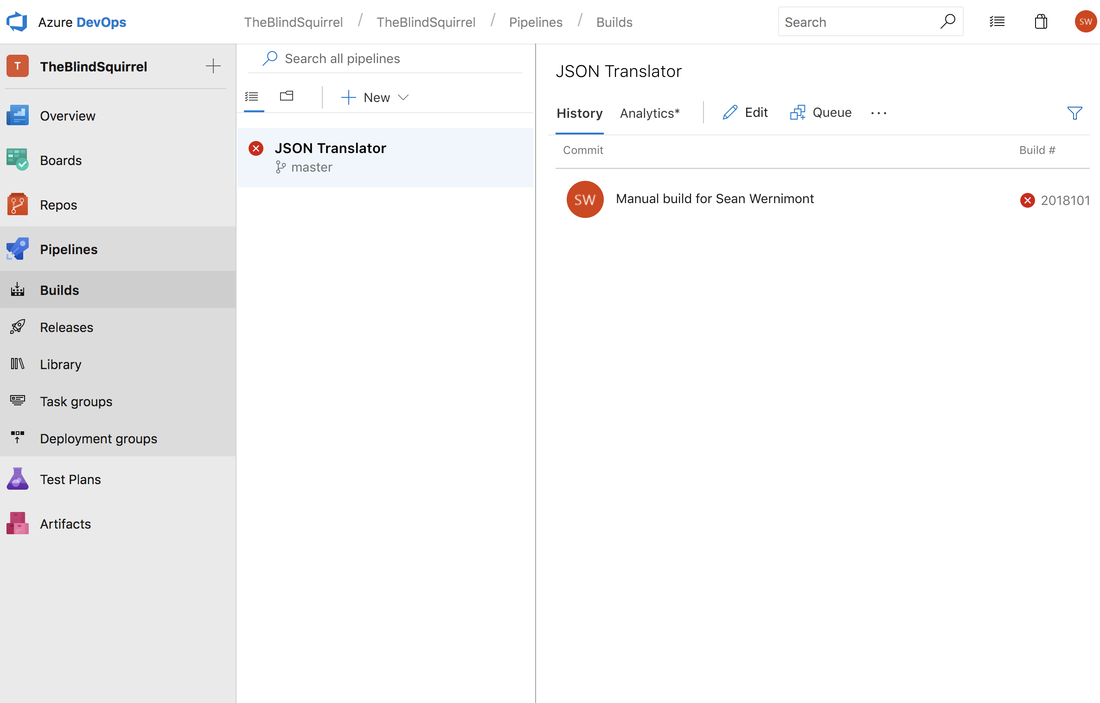
This is where we will be spending the bulk of our time today. By default the build has the same name as the project with - CI appended on to it (it was TheBlindSquirrel - CI, but I changed the build name). This page will list all of the build pipelines in this project as well as their current status. The right side shows the history for the currently selected build as well as actions to edit edit the build steps or queue up a new manual build. Click Edit.
Now you should see a screen similar to this one. From here you can edit the build name, change the steps and configure all the other options, like build number. The steps and parameters that are setup by default will vary depending on which technology and application you selected when you were creating the project. Since I just picked .Net Core Web and my project is .Net Core Desktop written in F# I'm need to change a few things.
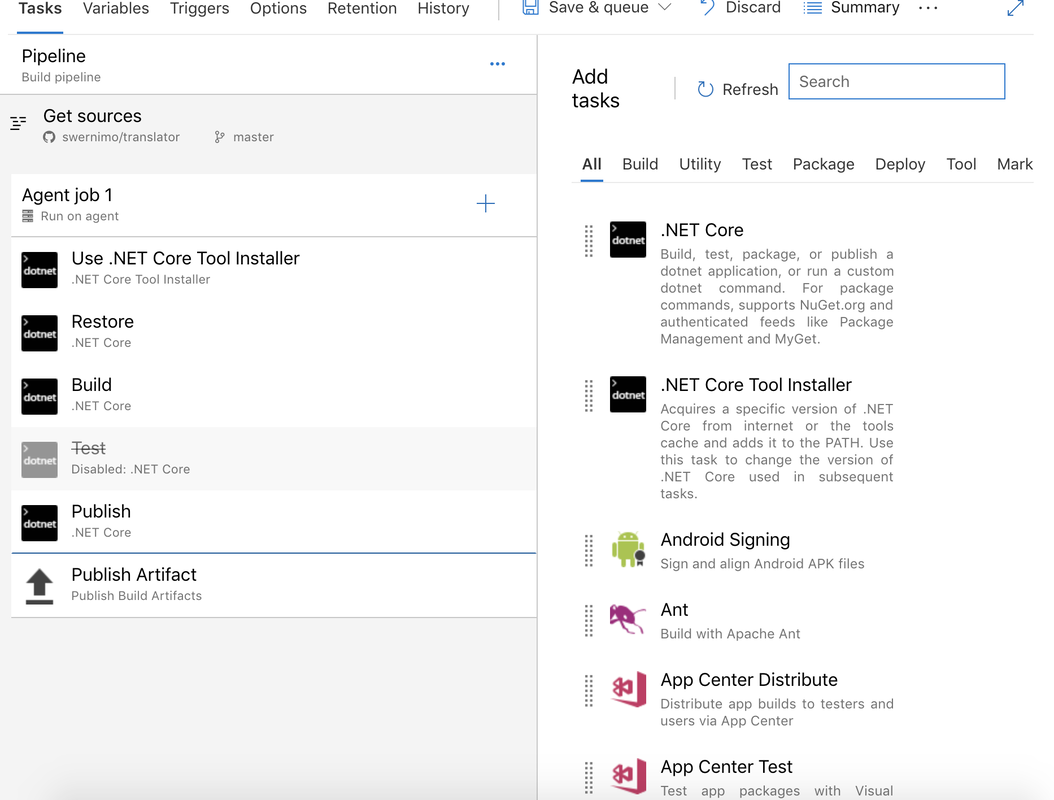
First, I'm going to clear the Project(s) to test field since I don't have any unit tests setup yet. Next I need change the projects to restore and build to fsproj, instead of csproj. Then I'm going to disable the Test step, you could delete it but I'm going to leave it disabled as a reminder that I should to go back and create some unit tests. If you right-click on the a task you will be given the option to Delete the task or enable/disable or clone the task, as well as a few other options. There is one more step I want to add to my build process. At the end of the build, but before the the artifacts are published I want to package the code as a nuget package. To add a step click on the + to the right of Agent Job 1. 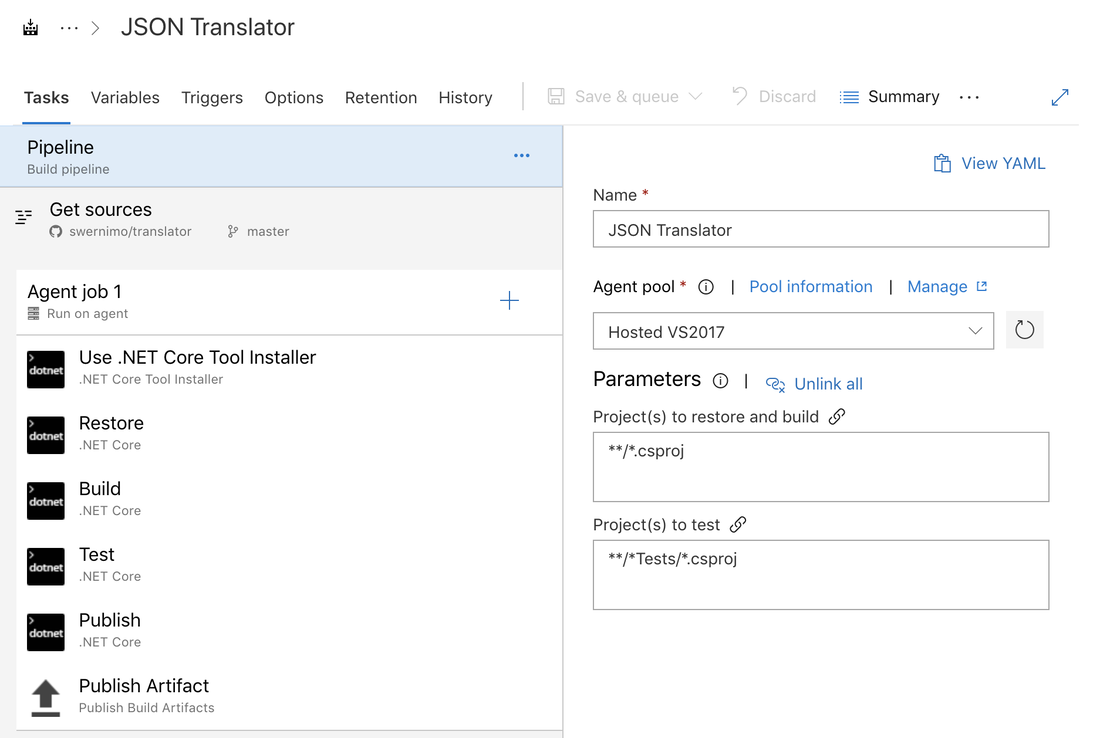
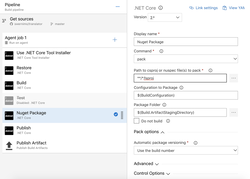
After clicking the + the Add Task pane will slide out from the right and you can search to find whatever function you need to accomplish. If you can't find an existing task that fits your needs you can search through the Marketplace and see if there is one that fits your needs. I'm going to select the .Net Core task to package the solution. There is task specific to Nuget, but I've been having issues running nuget pack on a .Net Core 2 project. The workaround has simply been to use the command dotnet pack instead so that's what I'm going to do.
The new task will be added to the end of the build. To move the task you can simply click and drag to where you want it. I have chosen add the package step before the Publish step. I've changed the display name, the path to the project file and under Pack options I've changed the package versioning to match the build number. By default the build number will be in the format of YearMonthDay.buildnumber. I prefer the major.minor.release.buildnumber pattern so I'm going to change that next.
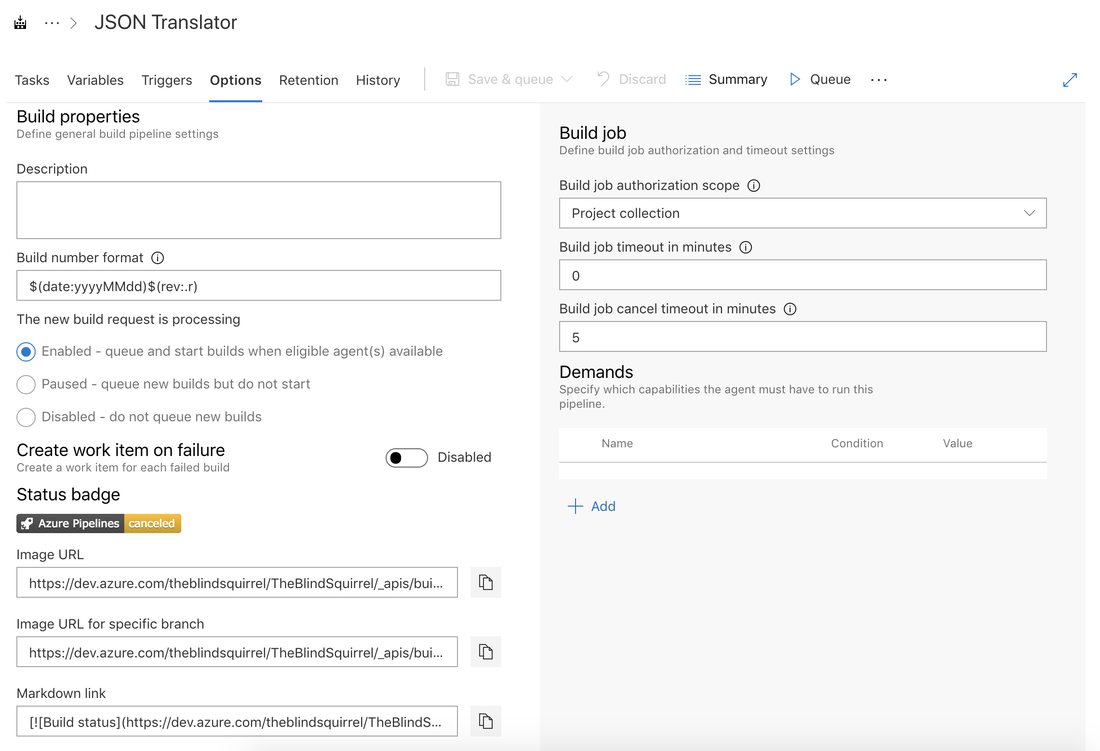
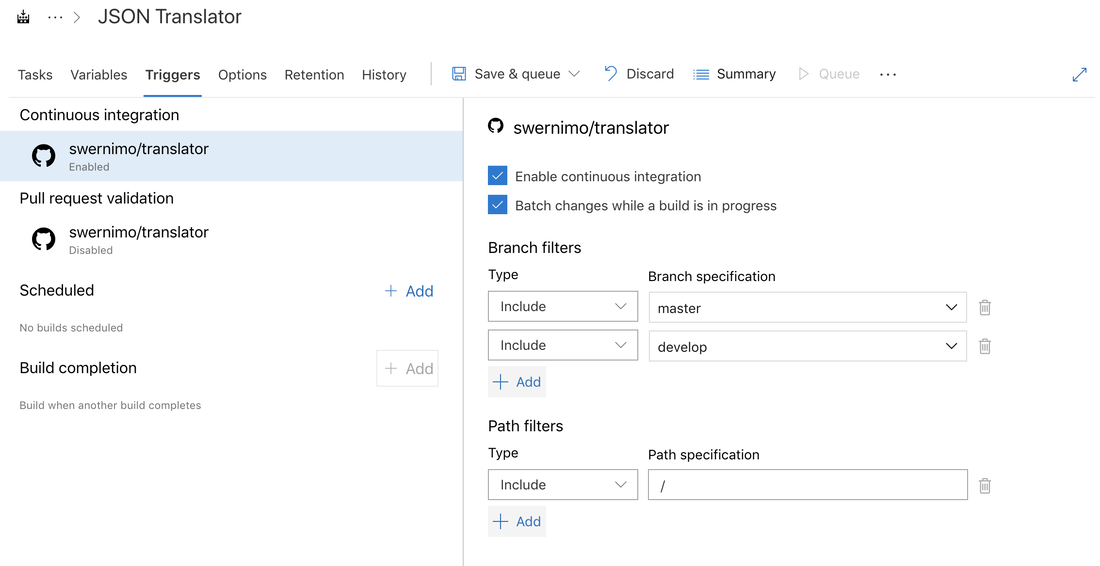
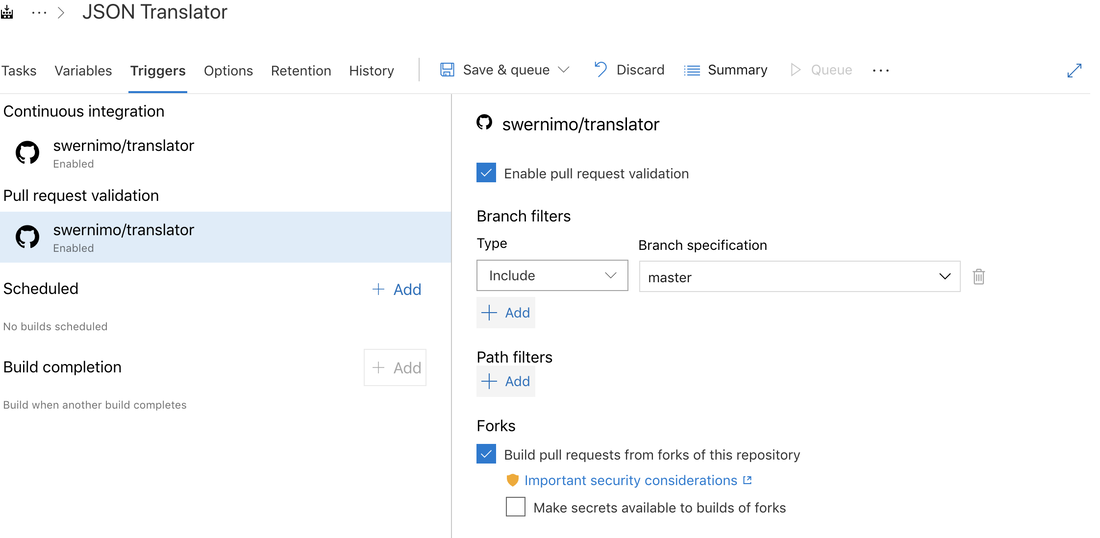
To change the build number pattern click on the Options tab across the top. I'm going to change the build number to 1.0.0$(ref:.r). Note, that the build will automatically add a period as part of the rev:.r placeholder. The Options panel is always where we will get the URL needed to display the status badge on our github repo. Next I'm going to add an additional Trigger.
The default Branch Filter will match whatever branch you selected in Step 1. I added the develop branch filter since I'm using develop as develop and master as my release branch. I'm going to leave Pull Request Validation Disabled but it might be something that you need to enabled for your organization.
I think we're ready to save and the configuration and queue a new build. To do that we can simply click Save & Queue in the top menu. A drop down will appear and click Save & Queue there. Next a popup will appear where you can save a comment, change the build agent pool, branch or change build variables. I'm going to leave everything default and just click Save & queue at the bottom.
Once you've saved and queued the build you should see a small banner message at the top saying build #{buildNumber} has been queued. If you go back to the build dashboard you should see the new build is running. Clicking on the name of the build (Manual Build for ... in this case) will take you to that specific build. You can watch the build steps as they finish and view any error logs from here. Looks like my build did error out on the Publish step. Time to edit the build and try again. 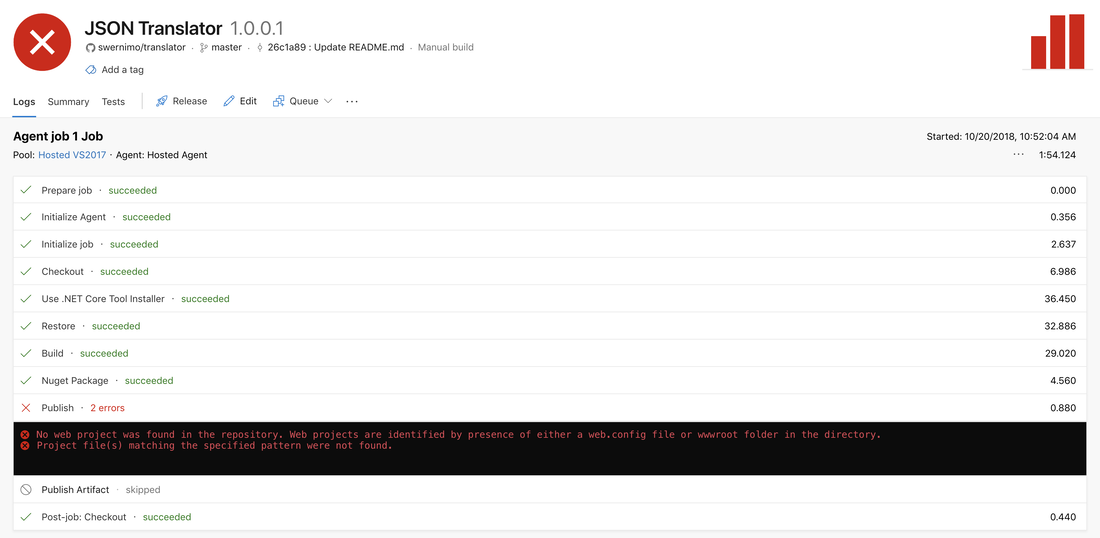
If you click Edit from here you will be taken back to edit build page. Since I'm not publishing a web project I'm just going to delete that Publish step and queue up a new build. You can click on the build number in the banner message to be taken that current build.
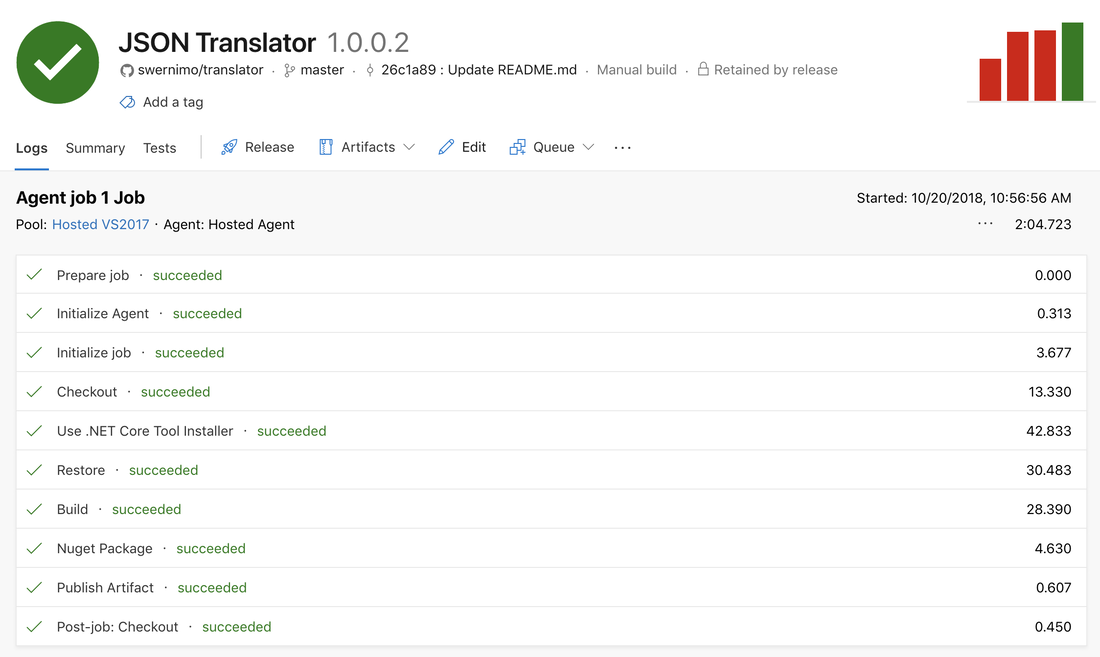
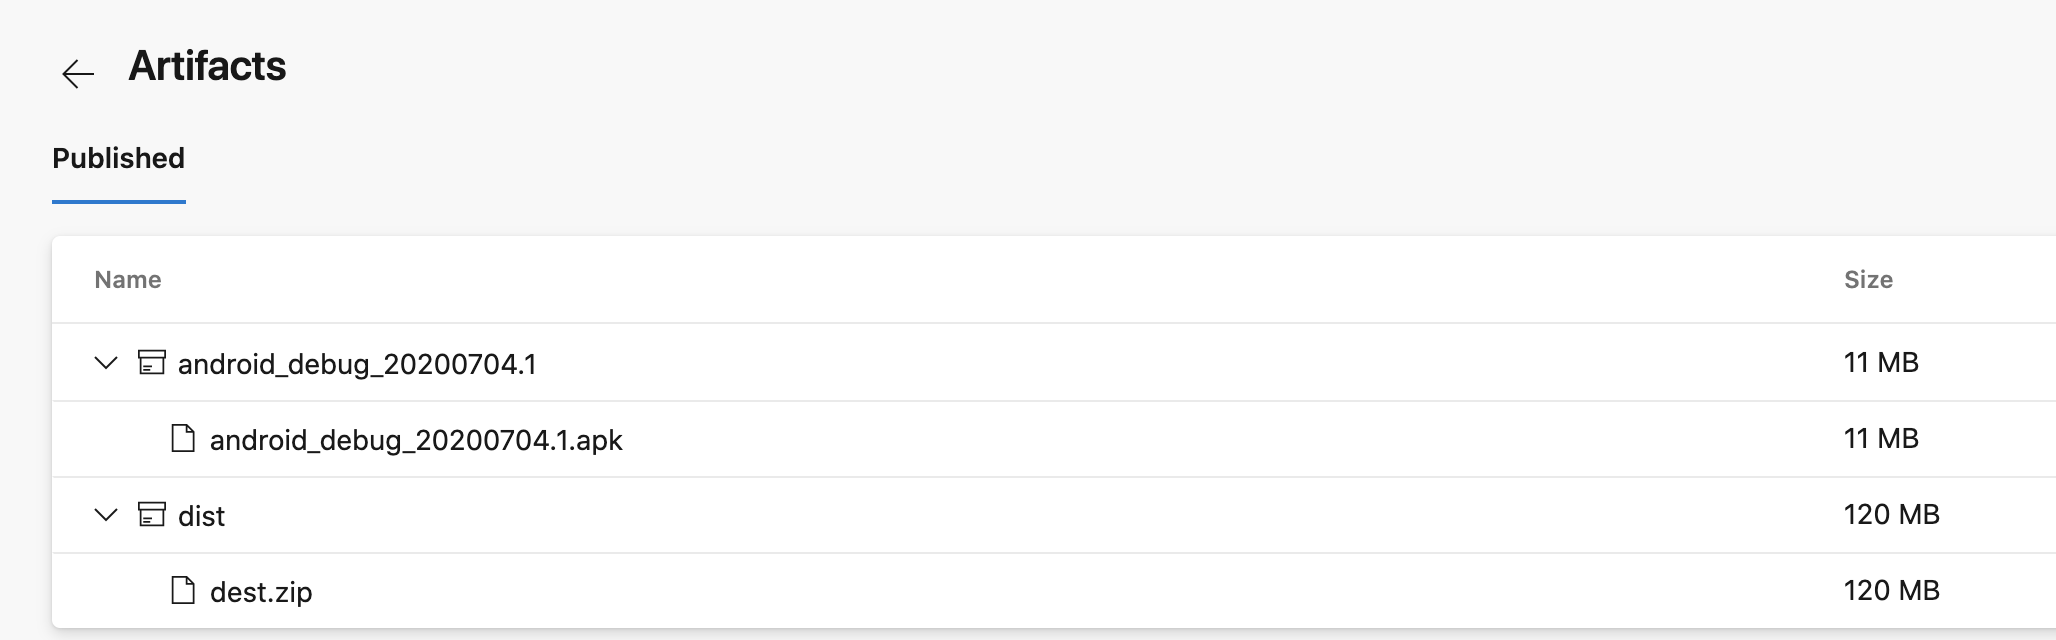
Now that the build has completed we should check the artifacts to make sure that the nuget package was created. Azure names the artifact folder drop. Simply expand the drop and see if your artifacts were created.
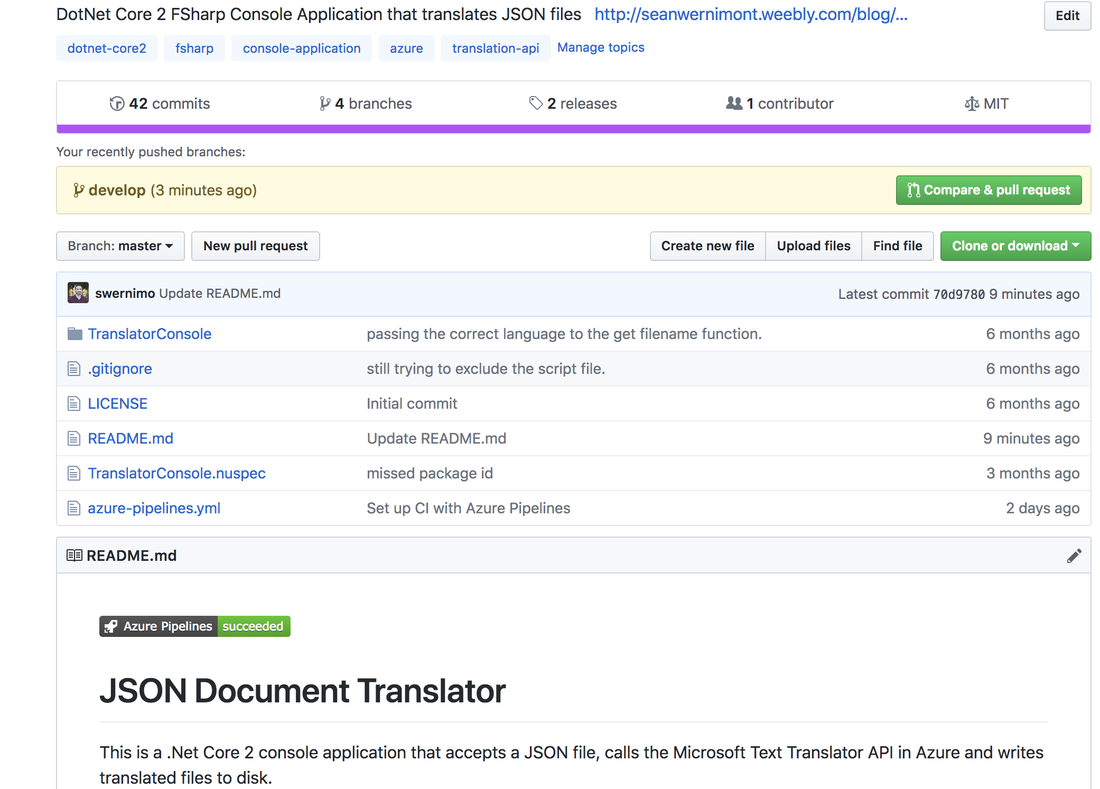
That's it for setting up the build. Now I want to add the status to my readme file and kick off a test commit to see if the CI pipeline is truly working. Adding the status badge is very simple. Just copy the markdown URL from the Build Options pane and add it to the top of your readme file.
Since I edited the readme file in both my master and develop branches and setup the build to watch both of those branches you can see that the pipeline automatically kicked off two CI builds, one for each branch. 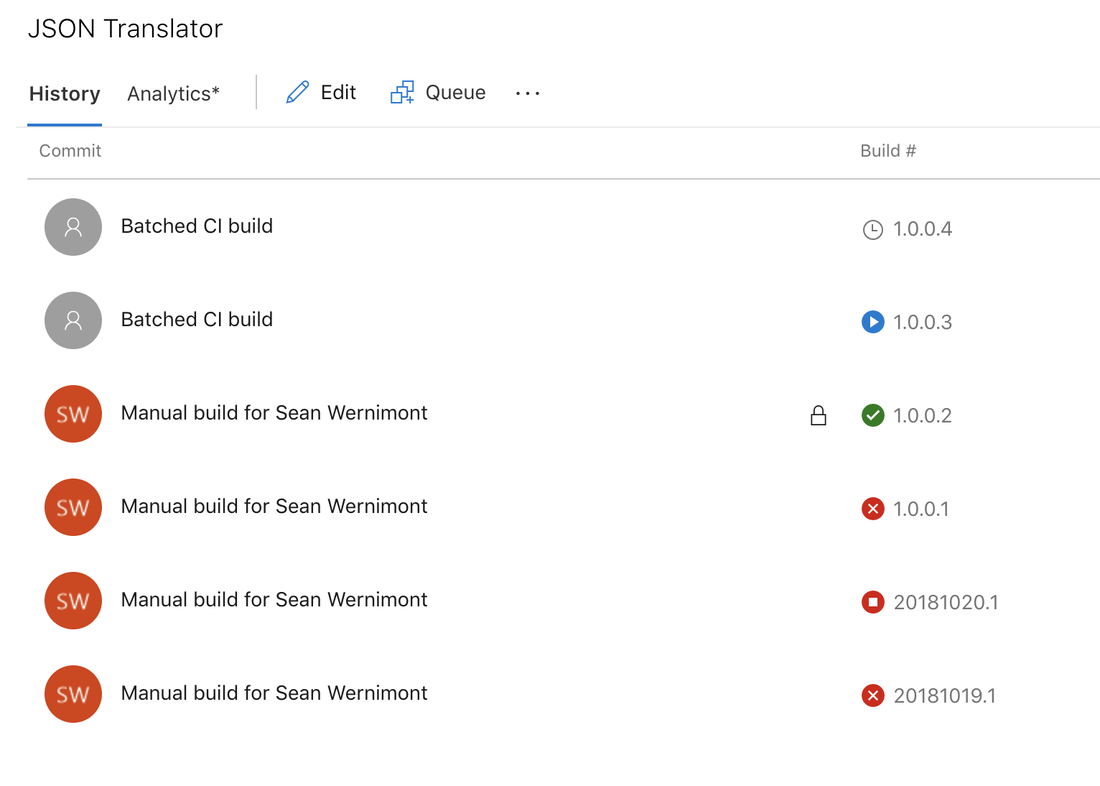
That's it for today. We setup our build process to watch for changes in two branches in our repo, verified that the build artifacts were being created, added the build status badge to the readme file and committed a change to make sure that the CI process was setup. Thanks for making it this far and I'll see you in Part 3: Setting up the Release Pipeline.
Happy Coding. |
AuthorWelcome to The Blind Squirrel (because even a blind squirrel occasionally finds a nut). I'm a full-stack web and mobile developer that writes about tips and tricks that I've learned in Swift, C#, Azure, F# and more. Archives
April 2018
Categories
All

|
 RSS Feed
