|
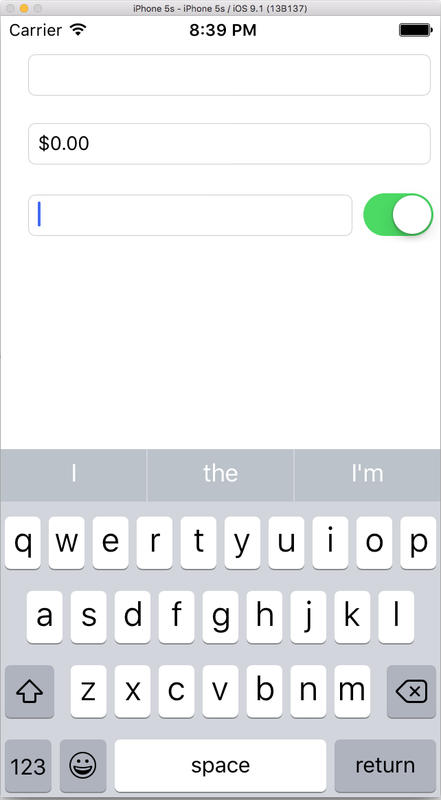
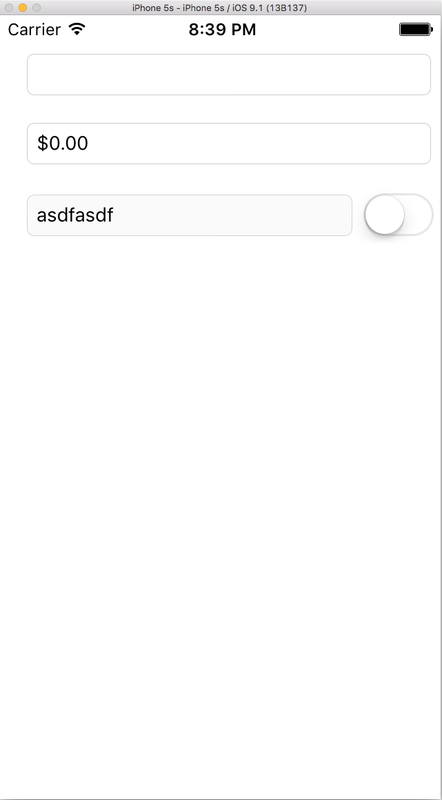
This is the 3rd and final part of the challenge app for Lesson 3 of Udacity's UIKit Fundamentals I course for their iOS Developer Nanodegree. This piece was so simple that I thought about just including in my previous post but decided to make another very small, short post about it. As a refresher here is my UI on initial load.  Since this textfield also interacts with another control I decided to just use the primary view controller as the UITextFieldDelegate, instead of creating a different class like I did for the other two textfields. Here is my entire view controller for this storyboard. As you can see there isn't much there. 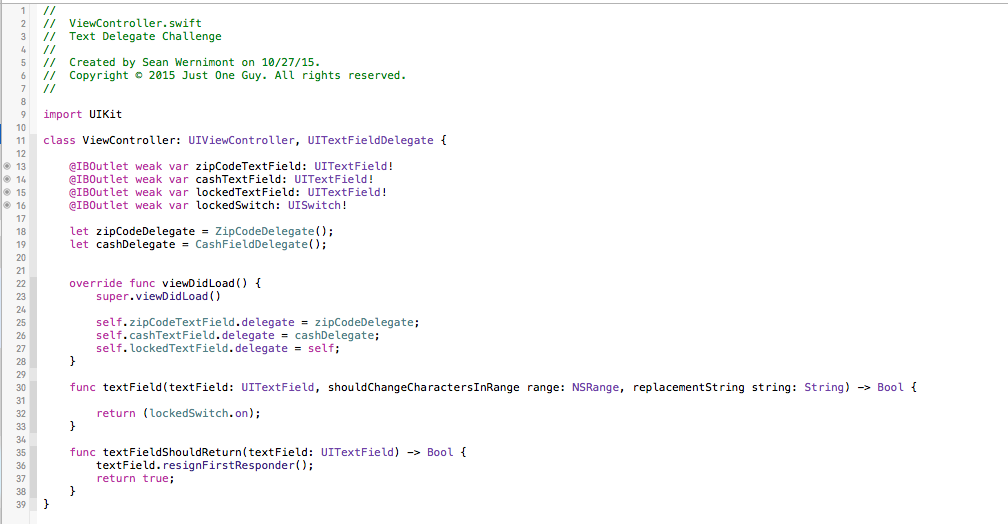 I didn't change the keyboard type for this textfield because there isn't any kind of limit on what can be entered into the textfield. Since I had an outlet reference to the switch I simply returned the value of the switch at line 32. If the switch is on then text can be entered, if the switch is off then no text can be entered and also no text can be removed. The textfield is completely locked with the switch in the off position. I could have created an outlet action for the value changed event of the switch and then set the enabled property of the textfield but since the challenge was to work with UITextFieldDelegates I decided not to do that. Just for reference here is the same view controller with the delegate logic commented out and using a switch action instead. 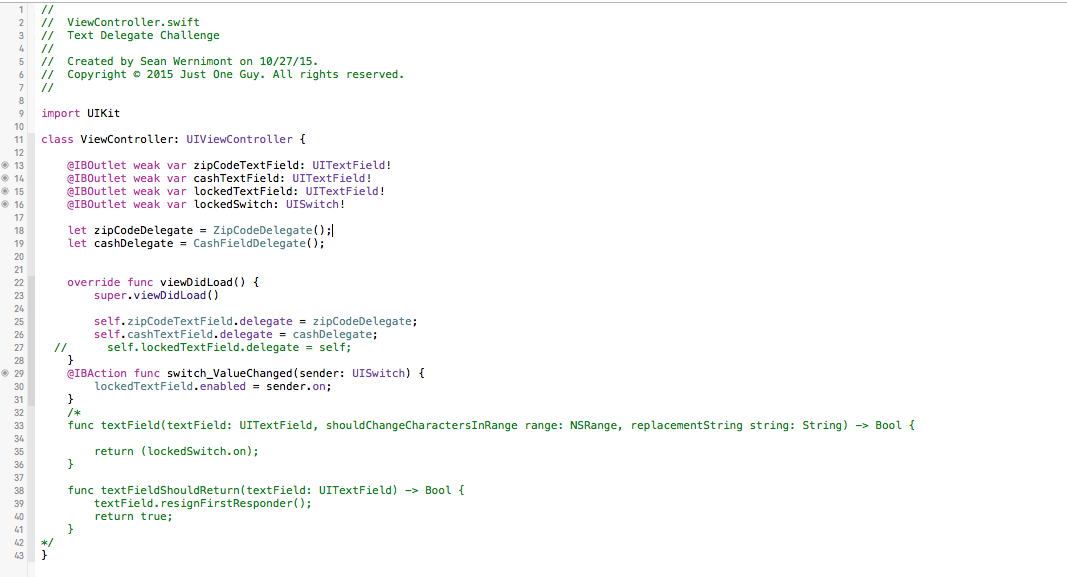 The left side is the app with the switch on and textfield enabled. The right side is switch off and textfield disabled. If you like the look of the disabled textfield you could also expand the delegate method and at line 31 of the second screen shot add textField.enabled = lockedSwitch.on; I just choose not to do that.
I hope you enjoyed this short series on working with UITextFieldDelegates. My current plan is to continue write up small, short posts as I go through each lesson within each course and then create another post(s) for the project that I will submit for each course. That is my plan, but we'll see how well I follow through with that.
Here is my github repo for this specific work. https://github.com/swernimo/iOS/tree/master/UI%20Kit%20Fundamentals%201/Text%20Delegate%20Challenge. Check out all my repos and follow allow with me as I learn Swift. Good luck and happy coding. This is the second part of the lesson that I posted previously. This post will focus on creating the fill from right cash text field. As a reminder, the fill from right cash field always displays the dollar symbol, something in the ones place (0 on initial load) and fills in the text from the right side. So on first load the text field shows $0.00 then if you were to enter 5 it would show $0.05. If you entered 1-5 then it would show $5.15. So let's dig in. To start with I set the keyboard type to Number Pad like I did with the zip code field in my previous post. Here is my first attempt at this problem. 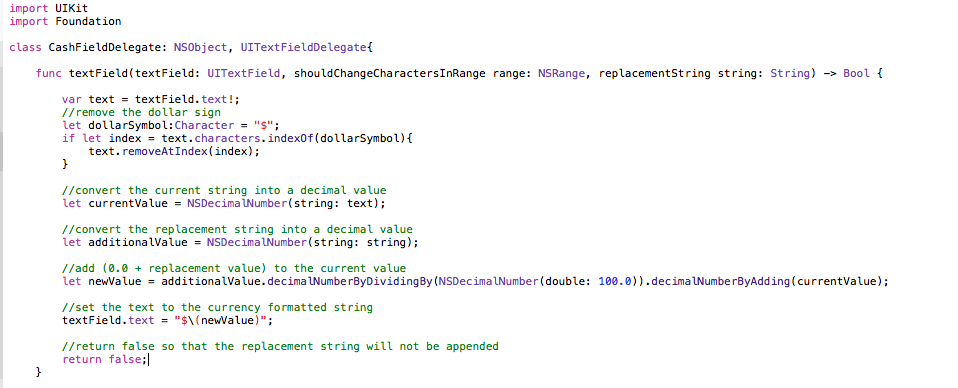 I'm not too far off. With that code there is a bug in how the new value is being calculated. As it stands if you have $5.15 and then enter 2 you will get $5.17 instead of the desired $51.52. On a side note does anybody know of an easier way to problem math operations on NSDecimalNumbers? Personally, I don't like that syntax. I think it is more difficult to read than this. But as you can see it generates a compiler error so I switched to using the built in methods off of NSDecimalNumber.  I don't know if it is because I'm new to the language (very good chance) or because of how the language is designed using the methods off of NSDecimalNumber doesn't read as clearly to me as just using the symbols like I would in C#. 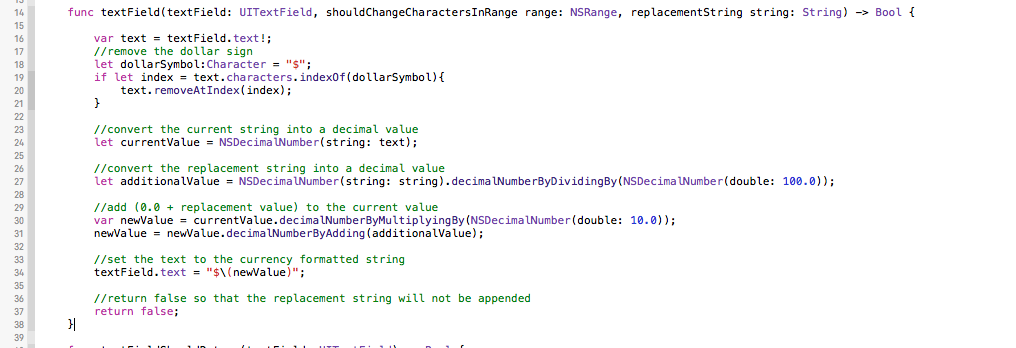 I made a few changes and now everything seems to be working. If this were some production code I would certainly want to add unit testing around this, but it is good enough for this. I moved the logic to divide the new number of 100 onto the line 27 where I am creating the additionalValue variable as a NSDecimalNumber. Then on line 30 I take the current value and multiple it by 10 to free up the last digit and finally on line 31 I add the new additional value, created on line 27, to the current value. I hope that makes sense to you. If not let me and I'll try to clarify it. Thanks for reading and happy coding.
|
AuthorWelcome to The Blind Squirrel (because even a blind squirrel occasionally finds a nut). I'm a full-stack web and mobile developer that writes about tips and tricks that I've learned in Swift, C#, Azure, F# and more. Archives
April 2018
Categories
All

|
 RSS Feed
