|
As part of the Udacity's iOS Development with Swift Nanodegree program, I've been working UIActivityView's recently. The UIActivityView is typically used to share things via email, SMS, as well as iCloud. The built is functionality is great and covers my needs for this project. The issue that I've come across is that I want to wire into the completion event and do some things, like dismiss the view controller, whenever the user has successfully shared something. So have digging a bit I came across the class reference for UIActivityViewController on Apple's website. Beginning in iOS the CompletionHandler property is deprecated and it is recommended that you use the CompletionWithItemsHandler so that is what I'll be using. The CompletionWithItemsHandler property is a typealias that will pass 4 parameters, 3 of which are optional, to handler you create. The four parameters are (in order): activity of type String?, completed of type Bool, returnedItemd of type [AnyObject]?, and error of type NSError?, for a more complete definition see the Apple reference page that I linked earlier. Only bool is required and that is the property that I care about for this exercise. The completed property does pretty much what you'd expect it to do. It is true when the action was successful and false if the action was not successful or if the user canceled the view without taking an action. I'm using a closure to wire up the completion event. Here is my code to create the view controller and wire up the completion event. let activityView = UIActivityViewController(activityItems: [meme.memeImage!], applicationActivities: nil); And that's about it. Nothing too fancy just a simple way to wire up to the completion event handler for the UIActivityViewController and do something before dismissing the view controller. If you wanted to log the by checking if the error is not nil. For my purposes right now I don't care about the errors so I will be removing that in my code. You could also use the activity parameter to do different things based on which activity the user took. Finally, the returnedItems arrays is an array of NSExtenionItems. The array contains any modified data for the activity items that you supplied when you initialized the activity view controller. If no data was modified then this parameter will be nil. I hope that helps and as always. Happy Coding.
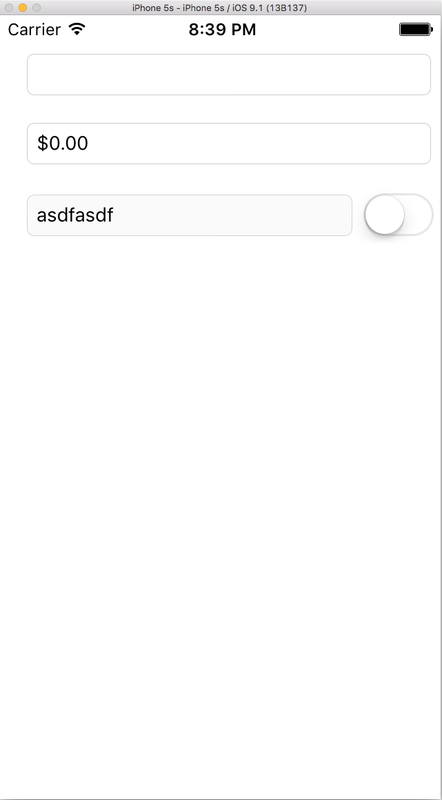
This is the 3rd and final part of the challenge app for Lesson 3 of Udacity's UIKit Fundamentals I course for their iOS Developer Nanodegree. This piece was so simple that I thought about just including in my previous post but decided to make another very small, short post about it. As a refresher here is my UI on initial load.  Since this textfield also interacts with another control I decided to just use the primary view controller as the UITextFieldDelegate, instead of creating a different class like I did for the other two textfields. Here is my entire view controller for this storyboard. As you can see there isn't much there. 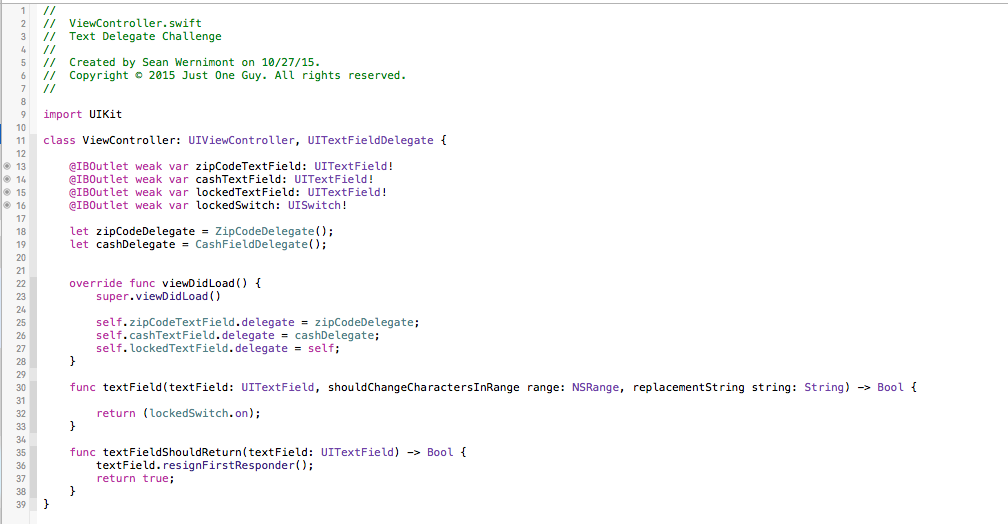 I didn't change the keyboard type for this textfield because there isn't any kind of limit on what can be entered into the textfield. Since I had an outlet reference to the switch I simply returned the value of the switch at line 32. If the switch is on then text can be entered, if the switch is off then no text can be entered and also no text can be removed. The textfield is completely locked with the switch in the off position. I could have created an outlet action for the value changed event of the switch and then set the enabled property of the textfield but since the challenge was to work with UITextFieldDelegates I decided not to do that. Just for reference here is the same view controller with the delegate logic commented out and using a switch action instead. 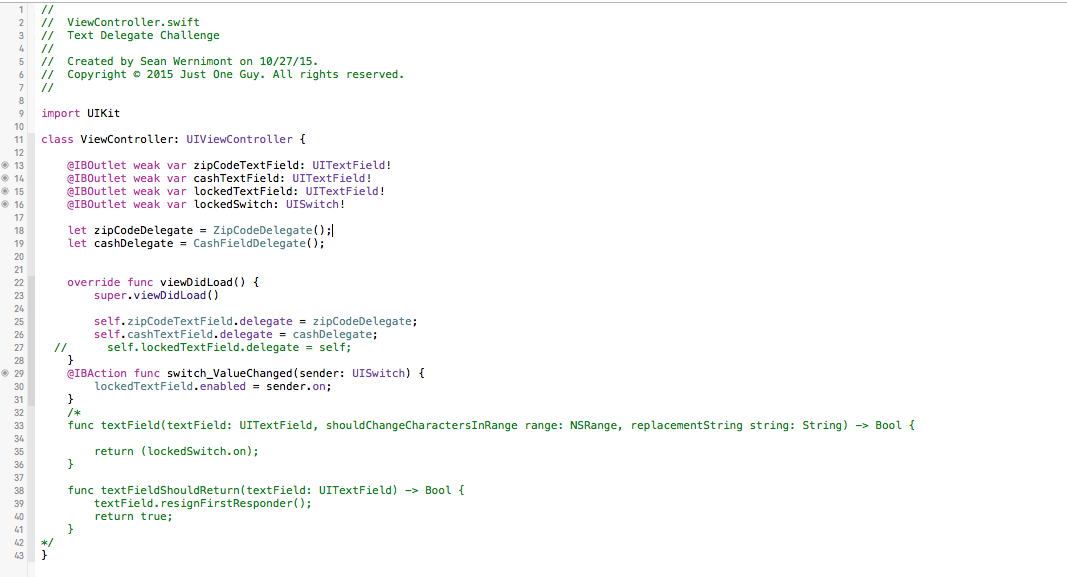 The left side is the app with the switch on and textfield enabled. The right side is switch off and textfield disabled. If you like the look of the disabled textfield you could also expand the delegate method and at line 31 of the second screen shot add textField.enabled = lockedSwitch.on; I just choose not to do that.
I hope you enjoyed this short series on working with UITextFieldDelegates. My current plan is to continue write up small, short posts as I go through each lesson within each course and then create another post(s) for the project that I will submit for each course. That is my plan, but we'll see how well I follow through with that.
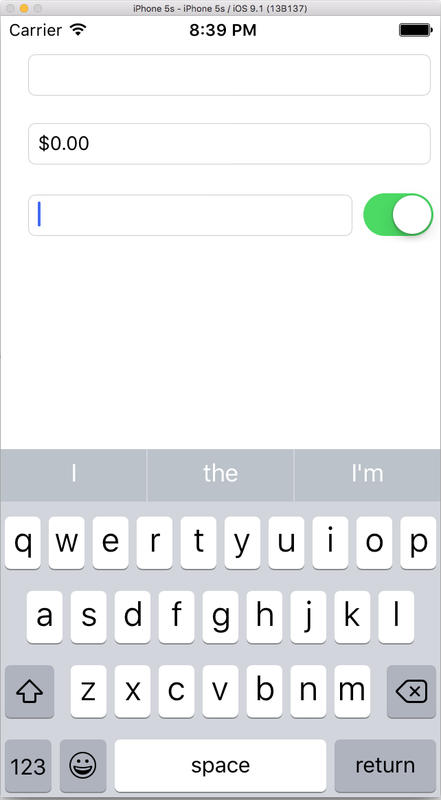
Here is my github repo for this specific work. https://github.com/swernimo/iOS/tree/master/UI%20Kit%20Fundamentals%201/Text%20Delegate%20Challenge. Check out all my repos and follow allow with me as I learn Swift. Good luck and happy coding. This is the second part of the lesson that I posted previously. This post will focus on creating the fill from right cash text field. As a reminder, the fill from right cash field always displays the dollar symbol, something in the ones place (0 on initial load) and fills in the text from the right side. So on first load the text field shows $0.00 then if you were to enter 5 it would show $0.05. If you entered 1-5 then it would show $5.15. So let's dig in. To start with I set the keyboard type to Number Pad like I did with the zip code field in my previous post. Here is my first attempt at this problem. 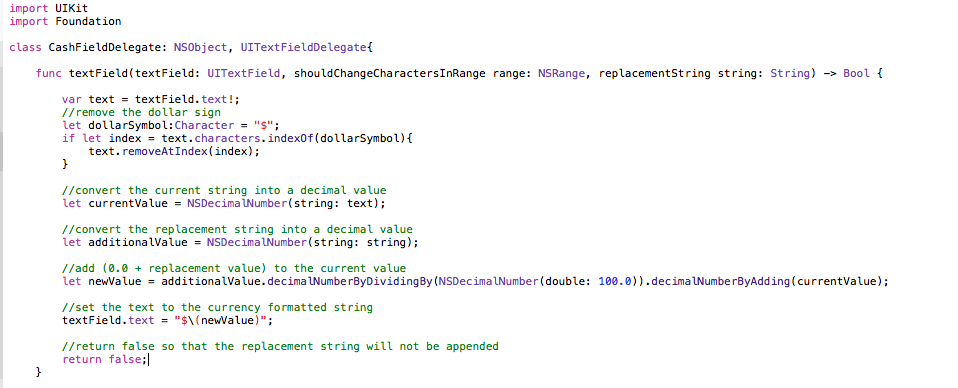 I'm not too far off. With that code there is a bug in how the new value is being calculated. As it stands if you have $5.15 and then enter 2 you will get $5.17 instead of the desired $51.52. On a side note does anybody know of an easier way to problem math operations on NSDecimalNumbers? Personally, I don't like that syntax. I think it is more difficult to read than this. But as you can see it generates a compiler error so I switched to using the built in methods off of NSDecimalNumber.  I don't know if it is because I'm new to the language (very good chance) or because of how the language is designed using the methods off of NSDecimalNumber doesn't read as clearly to me as just using the symbols like I would in C#. 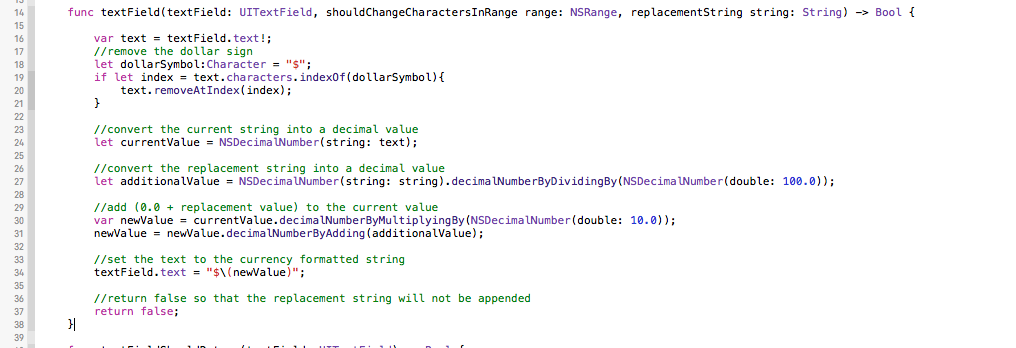 I made a few changes and now everything seems to be working. If this were some production code I would certainly want to add unit testing around this, but it is good enough for this. I moved the logic to divide the new number of 100 onto the line 27 where I am creating the additionalValue variable as a NSDecimalNumber. Then on line 30 I take the current value and multiple it by 10 to free up the last digit and finally on line 31 I add the new additional value, created on line 27, to the current value. I hope that makes sense to you. If not let me and I'll try to clarify it. Thanks for reading and happy coding.
Right now I'm working through Udacity's iOS Developer Nanodegree program. We're using Swift 2.0 and so far I'm really liking the program. I am currently working through the second course (UI Kit Fundamentals I) lesson 3 challenge app. This challenge app is working with UITextField Delegates. The challenge app consists of three textfields. The first textfield is a zip code field with a character limit of 5 and a numeric keyboard. The second field is a money field that contains a dollar sign at the left that always shows 2 places after the decimal. The text is filled in from the right and is appended onto the amount. So for example if you already entered $1.05 and then enter 3 the new value is $10.53. The final textfield is paired to a switch control. When the switch is on the textfield is locked and cannot be edited, when the switch is off then the textfield can be edited. I started working on the first textfield so that will be the focus of this post. The first thing I did was change the keyboard to numeric only.
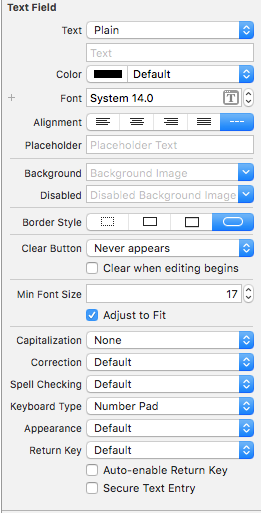
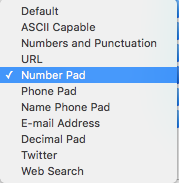
To change the on screen keyboard first open up your storyboard and selected the text field. Next expand your Utilities Panel (if hidden) and go to the Attributes Inspector. From there you can change the Keyboard Type (left screen shot). Now there are a number of other options for keyboard type, as you can see in the right screenshot, but for this project I chose Number Pad.
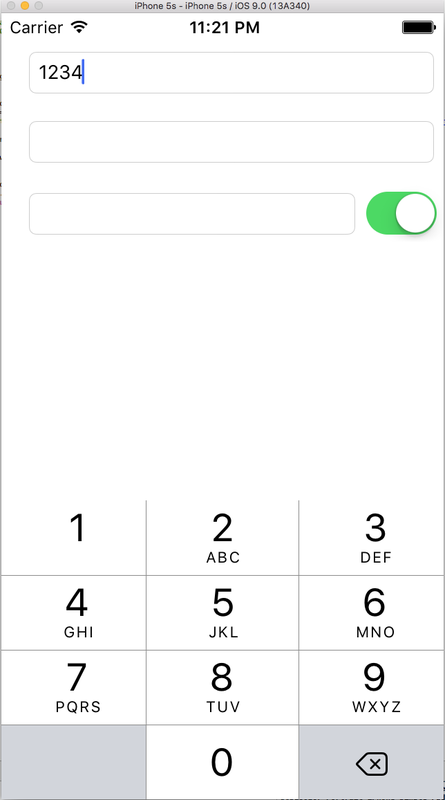
In .Net all string objects are also character arrays. This was the case until Swift 2.0, read Apple String Reference before for more information about why that was changed. The String object in Swift 2.0 now exposes a characters property that is the characters array. When you're working with the UITextFieldDelegate the function includes the textfield object, the range and the incoming string. Since I wanted to limit the number of characters to 5 I first needed to get the number of characters in the string. In the first screenshot the text (the local variable text) property of the textfield would be "1234" with a character count of 4. Now if I enter 5 the string parameter will have a value of 5. So I can simple add the existing length (4) and the length of the new string (1) and check if the new length will be less than or equal to my limit of 5. Which it is in this case so the method returns true and the new string is added to the existing string. If I already had 5 characters then the method would return false and not allow the new string to be appended.

Now this is a very simple use case. I didn't even touch the range object and I didn't do any kind of string manipulation. I just limited the number of characters. One thing you will notice if you were to run this code in the simulator is that even though the on screen keyboard is showing only numbers you can use your physical keyboard to enter non numeric characters. Since the on screen keyboard is limited to numbers I decided not to worry about it. I hope this was helpful to you. Happy Coding.
Here's a scenario that I ran into frequently when I was working in web forms. Let's say that you have form with some controls on it. Now let's say that you need to reset that form based on some user action or an event. Let's assume this is the markup of your aspx page. <%@ Page Title="Home Page" Language="C#" MasterPageFile="~/Site.Master" AutoEventWireup="true" CodeBehind="Default.aspx.cs" Inherits="WebApplication1._Default" %> Now inside your reset method you could go over each textbox one at a time and reset the text, like this, but I don't like that approach. protected void btnReset_OnClick(object sender, EventArgs e) First I think it takes too much repetitive typing and second you have to modify the method if you add another textbox. Now if you look closely there is another problem with this approach. I missed that zip code textbox. It is pretty easy to miss a single textbox. Now imagine if your page also had other controls like checkboxes or radio button groups. You can see that the reset method would quickly grow to be a large method. Let's see if we can find a better way. What I did was to create a static helper class and inside that class create a static method that will return all of the children controls of a given type. Here is the code for the helper class. public static List<T> GetControls<T>(Control root) Now you can change your reset method to simply call the helper method. In addition you don't have to change your reset method every time you add a new textbox. Let's see the GetControls<T> method in action. protected void btnReset_OnClick(object sender, EventArgs e) Much better. You don't have to worry about forgetting a control or changing your reset every time you change your aspx page. In this example I'm pointing the GetControls method at the root Page. You could just as easily point it at another control, like a table or a div, if you only wanted to clear a subset of the controls. Hope that is helpful for you and as always, Happy Coding.
To display the page numbers in Xcode (currently I'm using Xcode 7.0.1) simply go to Xcode > Preferences > Text Editing. Then check the box for Line numbers. It is that simple.If you want to be able to collapse a function, so you only see the signature, then check the box for Code folding ribbon. 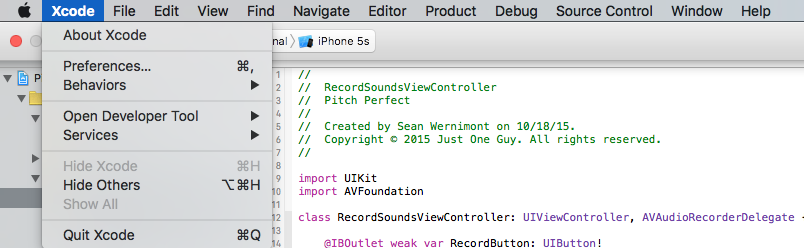 Personally, I don't know why this option isn't checked by default. The option to highlight a section of code when you hover over that area in the left side bar (the bar that you click on to collapse or expand a function) is Focus code blocks on hover. 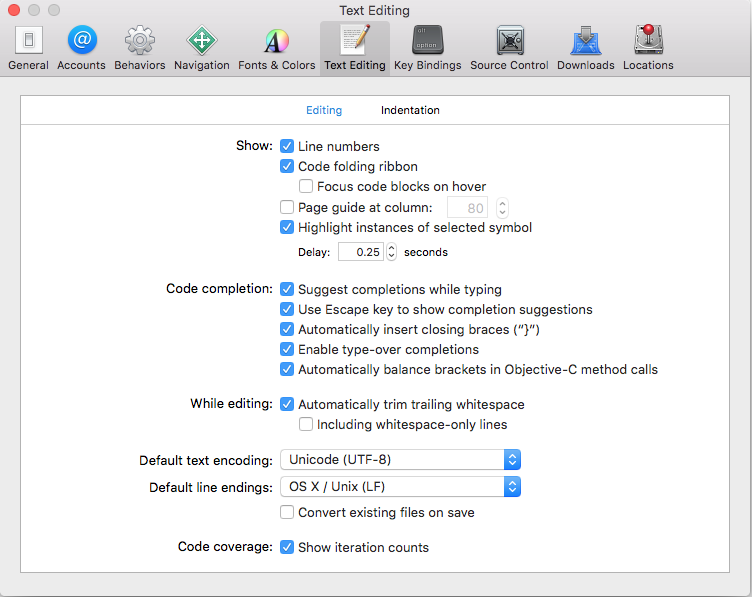 Personally, I find it really annoying when the code highlights so I have that option unchecked. Happy Coding.
|
AuthorWelcome to The Blind Squirrel (because even a blind squirrel occasionally finds a nut). I'm a full-stack web and mobile developer that writes about tips and tricks that I've learned in Swift, C#, Azure, F# and more. Archives
April 2018
Categories
All

|
 RSS Feed
