|
In Part 1 we setup the CI build to trigger on changes to master. In Part 2 we are going to modify the master build to output apk and ipa files we can install on our devices. Below is the complete YAML for the Android job let's go over it. Lines 40-46 are setting up some variables that will be later in the renaming and publishing tasks. Variables are scoped to their parent element, job in this case. Lines 49 & 50 are very important. By default all jobs run in parallel. I want this job to run after the JS bundle job so I added that as a dependency. The condition makes sure this job is only run if the JS bundle succeeds. You can also specify Always, if you want a job to run no matter what, Failed, to run only when the dependence failed, SucceedOrFailed, runs if the job succeeds or fails but not if the job was cancelled. Check out the documentation for more options. Jumping down a bit to line 55 we get into the actual build steps.
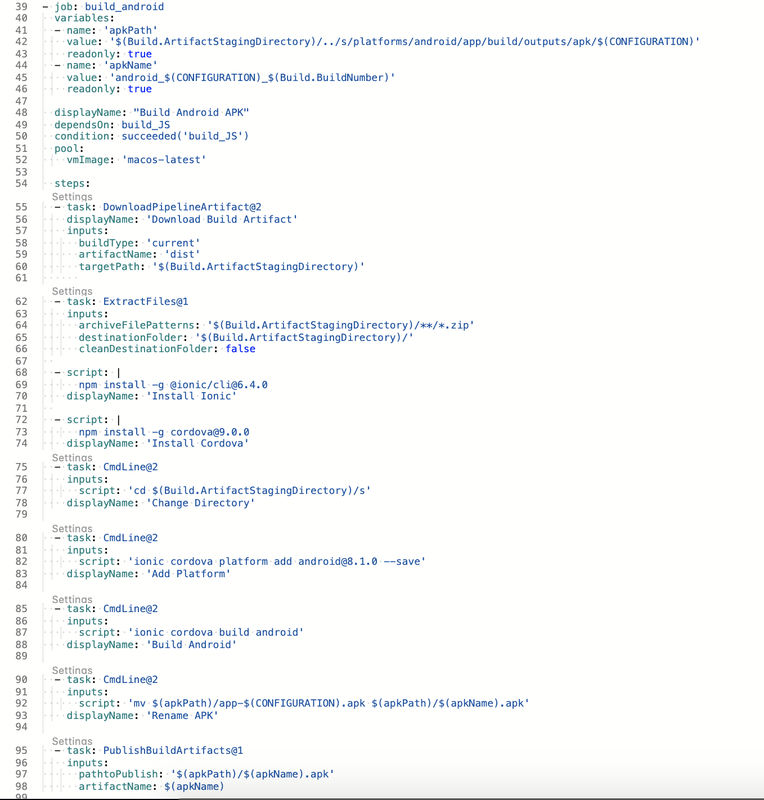
The whole point of splitting the JS bundling into its own job was so we didn't have to run it multiple times. The task starting on line 55 is downloading the zipped JS bundle that was created in the earlier job. A zipped bundle won't do much good to us. Lines 62-66 take the zip archive and extracts the files. Because I'm extracting the archive to the same folder as downloading I had to set the clean destination folder to false (line 66). The script tasks install a specific version of Cordova and Ionic that matches what I'm using locally. I need to change directories because the zip bundle includes an extra top level folder. The next two tasks (lines 80-89) add the android platform, again a specific version, and then finally builds the Android APK. By default cordova outputs a file named app-{configuration}. I don't find that name very useful. Since I'm running this job on a mac vm (line 52) I'm using the terminal command mv and the variables I defined at the beginning of the job. Finally I'm publishing the apk. Next up building the iOS app.
Because the iOS YAML is largely the same as Android I'm only going to show the differences. We'll start at the top and work our way down. First up is the variables.
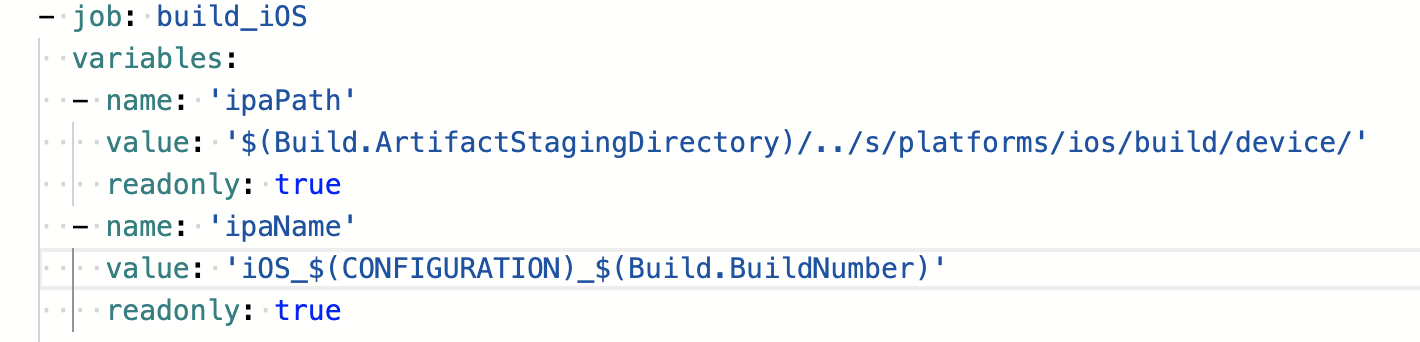
The only changes here are the different name and then folder location for the iOS app. Next difference is that we are installing iOS platform with its most current version. Next is getting the p12 certificate and the provisioning profile.

I only have the personal developer account, so I cannot generate these files. I have commented out the steps in my pipeline but you'll need them for production. In your pipeline make sure these steps are before your build step.
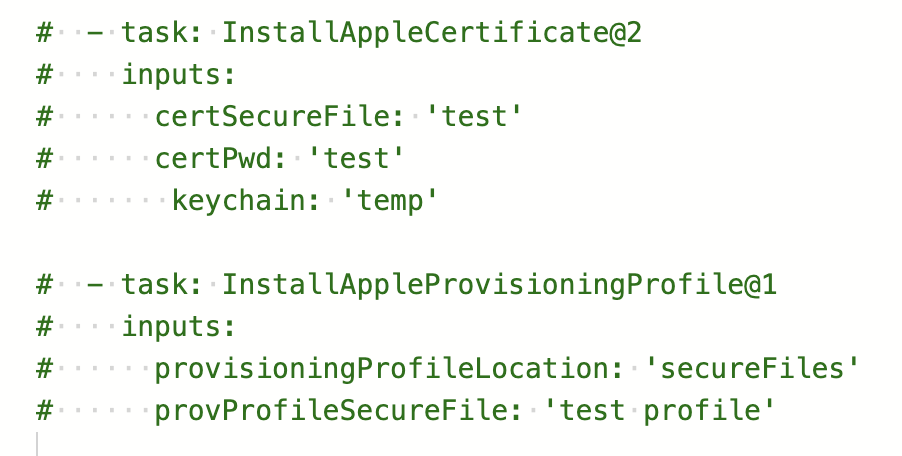
Each time you run the pipeline you get a new VM and need to install the files again. You can add the provisioning profile & p12 certificate as a secure files by going to Pipelines > Library > Secure files and adding a new file. Upload the file and make sure the name matches what you have in your build step. When I'm installing the p12 I'm using the temporary keychain so that the password gets cleared after each build is complete. See the documentation for these the certificate task here and the profile task here.


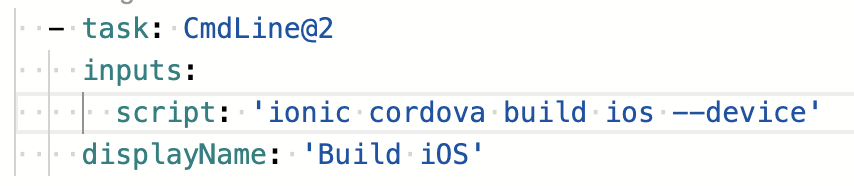
After installing the profile and certificate it is time to build the iOS app.
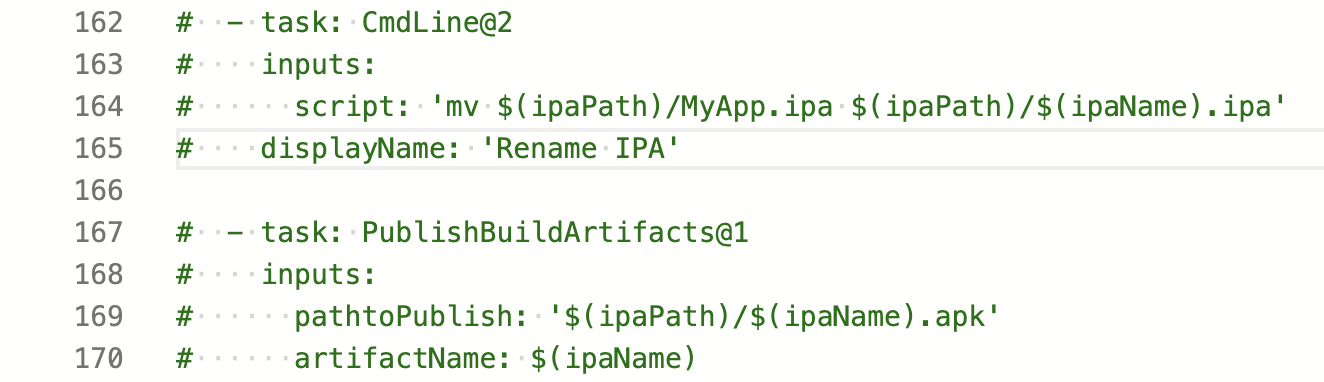
Once the build completes it's time to rename the ipa and publish it. We're using the variables we defined at the beginning for for app name and path. Another difference is the original app name. Android's was app-${configuration}.apk. iOS always outputs the file as your appName.ipa. You'll need to change MapApp.ipa on line 164 to match the name of your app.
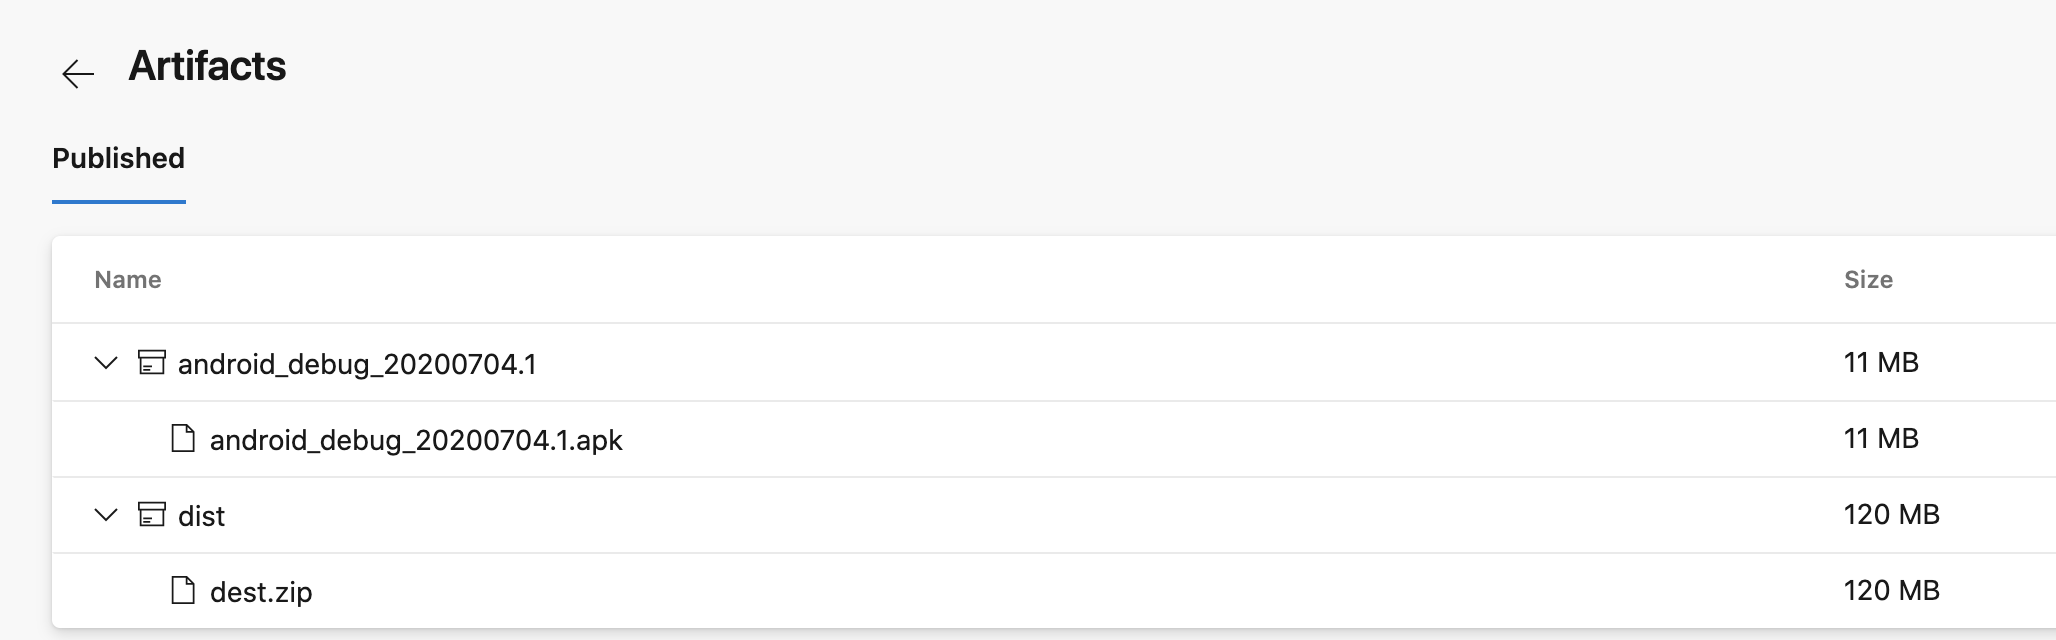
That's it! We have successfully created a CI pipeline that builds and publishes Android and iOS apps for us on every commit to master. After the pipeline completes you can check the artifacts and see your apps and the JS bundle from the first step. Again, since I only have the personal developer account I cannot generate the iOS builds.
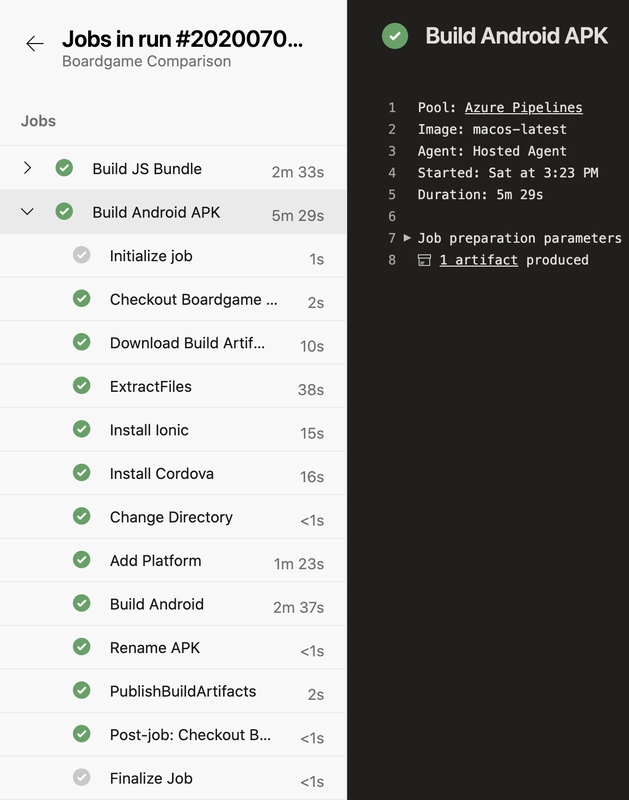
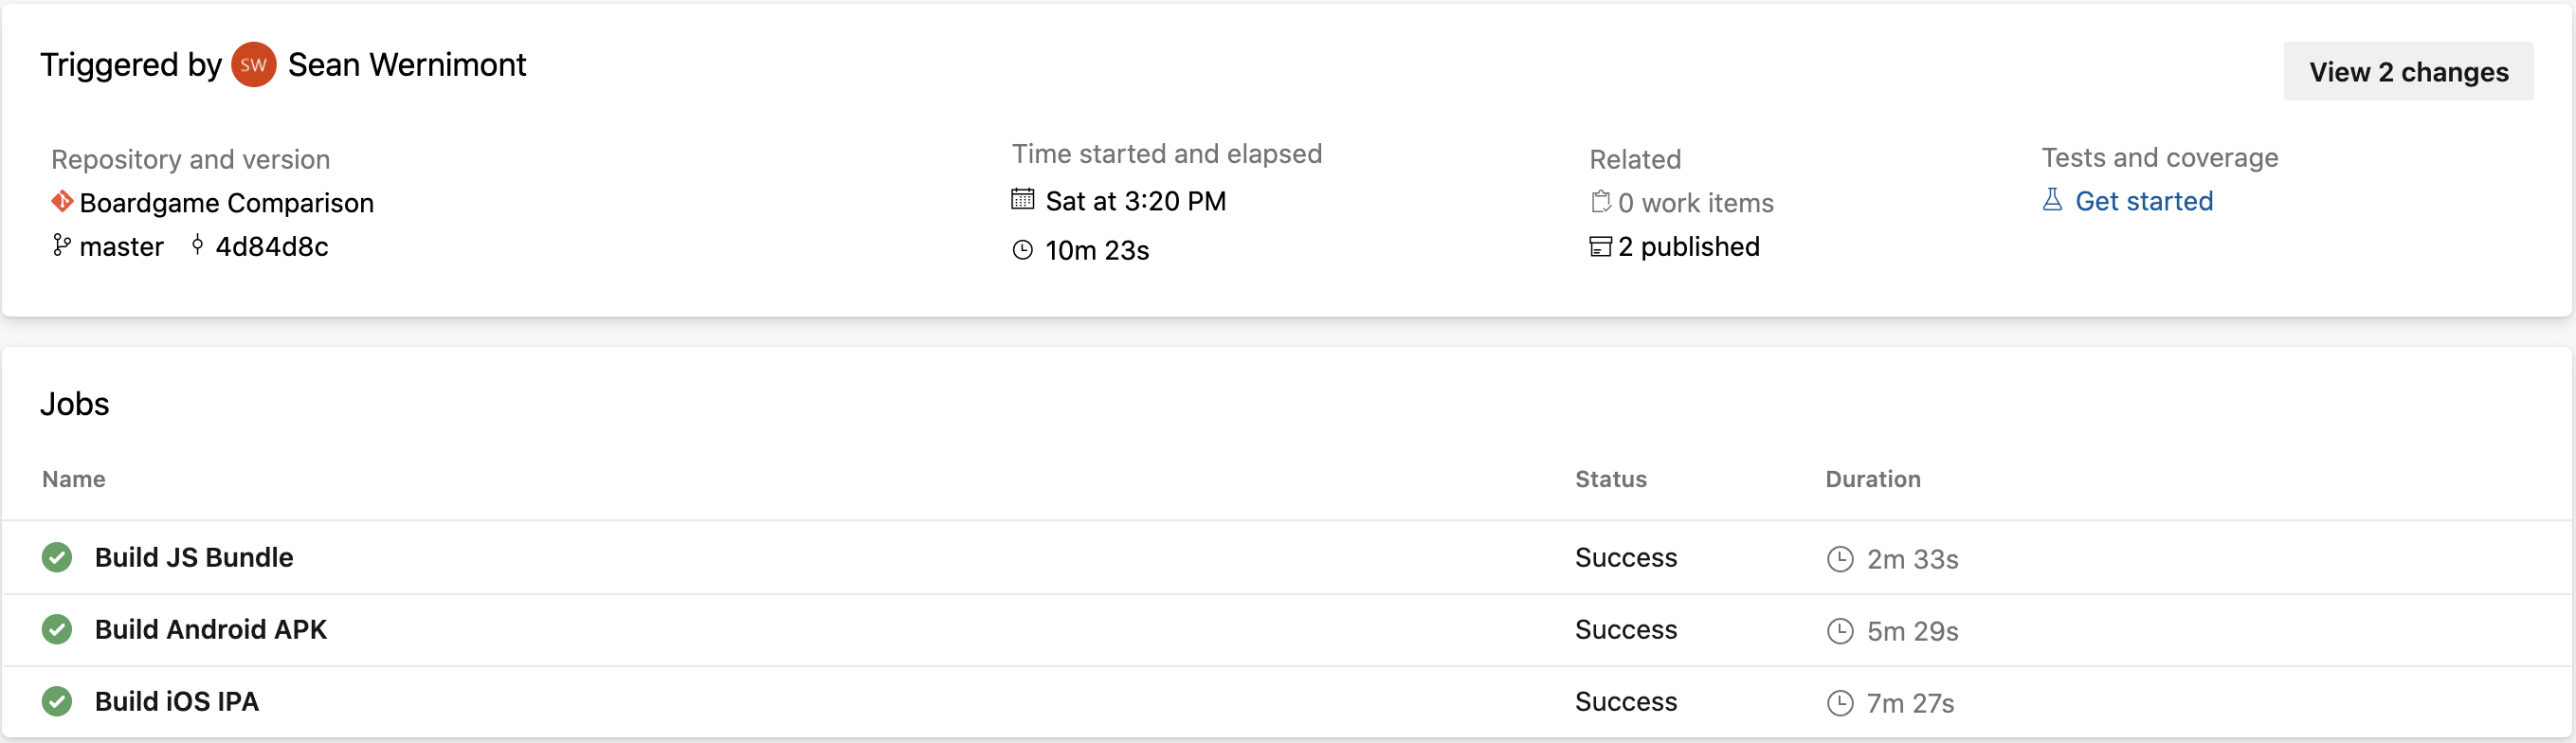
If we look at the summary for the build we can see the time taken by each job and then the total build time. We split the tasks into their own jobs to enable faster build times. We can see that the build only ran for about 10 and a half minutes but the total of the three jobs is closer to 15 and a half minutes. With this simple app and only running unit tests we saved about 5 minutes off our CI build. Something else you could look into to improve build times would be caching npm packages in the Build JS Bundle job.
That's it for now. I hope you found this helpful and as always, Happy Coding.
|
AuthorWelcome to The Blind Squirrel (because even a blind squirrel occasionally finds a nut). I'm a full-stack web and mobile developer that writes about tips and tricks that I've learned in Swift, C#, Azure, F# and more. Archives
April 2018
Categories
All

|
 RSS Feed
